Crispy, Sweet & Addictive: The Only Shakarpara Recipe You’ll Ever Need!

Shakarpara Recipe

Introduction

If you’ve never had Shakarpara before, you’re in for a crunchy, sugary treat that will instantly steal your heart. It’s that snack you pop into your mouth, thinking you’ll stop at one, and then suddenly, half the bowl is gone. Sound familiar?

This recipe will walk you through every step to make the crispiest, sweetest, and most addictive Shakarpara ever. Whether you’re prepping for Diwali, a tea-time snack, or just craving something sweet, this one’s a keeper.


The Origins of Shakarpara

Shakarpara has been around for centuries and is a beloved part of Indian cuisine, especially in states like Maharashtra, Gujarat, and Punjab.

A Traditional Indian Sweet with Deep Roots

It’s believed that Shakarpara has its roots in ancient temple offerings. Its simple ingredients made it accessible to everyone—from kings to commoners.

Regional Variations Across India

In Maharashtra, it’s called Shankarpali, while in Gujarat it’s Shakkarpara. North India even has a savory version, spiced with carom seeds and salt. But our focus here is the sweet, melt-in-your-mouth kind.


Ingredients for Perfect Shakarpara

Let’s talk pantry. You probably have everything you need already!

Basic Pantry Staples

  • 2 cups all-purpose flour
  • 1/2 cup fine semolina (optional but adds crispiness)
  • 1/2 cup sugar
  • 1/4 cup ghee or unsalted butter
  • A pinch of salt
  • Water (as needed)
  • Oil for deep frying

Optional Add-Ins for Extra Flavour

  • Cardamom powder
  • Nutmeg
  • Rosewater (for syrup)

Tools You’ll Need

You don’t need a fancy kitchen setup to make Shakarpara.

Kitchen Essentials

  • A deep frying pan or wok
  • Rolling pin and board
  • Mixing bowl
  • Slotted spoon

Handy Extras for Easier Prep

  • Candy thermometer (for syrup)
  • Pastry cutter (for uniform shapes)

Preparing the Dough

This step is key to getting the right crunch.

Getting the Texture Right

Mix flour, semolina, salt, and sugar. Rub in the ghee until the flour feels like breadcrumbs. Add water gradually and knead into a firm dough.

Tips to Avoid Common Mistakes

Too soft? It’ll absorb oil and turn soggy. Too hard? The Shakarpara will be tough. Aim for a tight but pliable dough.


Rolling and Cutting

This is where things get fun.

Shapes That Work Best

Traditionally, they’re cut into diamond or square shapes, about 1/2 inch in size.

Making It Look Pretty (But Not Too Fancy!)

Use a fluted pastry wheel if you want those cute wavy edges—but trust me, even rough cuts taste just as good.


Frying to Golden Perfection

Frying is an art—don’t rush it.

Oil Temperature Secrets

Heat the oil on medium. Drop a small piece in; it should rise slowly, not sizzle and brown instantly.

How to Get That Crunchy Exterior

Fry in small batches. Stir gently. Let them turn golden—not brown—before taking them out.


Making the Sugar Syrup

This is where the magic happens.

Getting the Right Consistency

You want a one-string consistency. Dip your fingers in the syrup and press them together—when you pull them apart, a single thread should form.

Coating Without Clumping

Toss the fried pieces into warm syrup and stir quickly so each piece is coated. Spread them on a plate to cool.


Cooling and Storage Tips

Patience, grasshopper!

How to Keep Them Crispy for Days

Let them cool completely before storing. If warm, the steam will make them soggy.

Best Containers for Storage

Use an airtight tin or glass jar. Stay away from plastic if possible.


Serving Suggestions

Snacks don’t have to be boring.

Traditional Pairings

Serve with masala chai or milk. They also make great prasad for pujas.

Modern Twists

Crush and sprinkle on vanilla ice cream. Or mix with nuts and dried fruits for a sweet trail mix.


Healthier Shakarpara Options

Because we all want our cake and to eat it too.

Baked Version

Yes, you can bake them at 350°F (180°C) for 15-20 minutes. They won’t puff as much but will still be delish.

Using Jaggery Instead of Sugar

Melt jaggery with a splash of water for the syrup—richer taste, fewer spikes in blood sugar.


Common Mistakes and How to Fix Them

No more Shakarpara fails.

Dough Too Hard or Soft?

Adjust with a spoonful of water or flour, one at a time. Trust your hands—they know.

Soggy Instead of Crispy?

Check oil temperature and make sure they’ve cooled fully before storing.


Kid-Friendly Shakarpara

Snack time = fun time!

Getting the Little Ones Involved

Kids love rolling and cutting dough. Let them help—you might even get new, weird, but lovable shapes.

Flavour Variants They’ll Love

Try cinnamon sugar or even a chocolate drizzle on cooled Shakarpara. Total hit.


Scaling the Recipe for Festivals

Got a crowd coming over? No problem.

Planning Quantities

This recipe makes enough for 4-5 snackers. Double or triple it for parties or gifting.

Storage for Bulk Batches

Layer with parchment paper in tins. Don’t refrigerate—they’ll lose the crunch.


Conclusion

And there you have it—the only Shakarpara recipe you’ll ever need. It’s crunchy, sweet, addictive, and crazy simple to make. Whether you’re reliving childhood memories or creating new ones, this treat has a way of bringing people together—one sugary bite at a time.


FAQs

1. How long does Shakarpara last?
Up to 2 weeks in an airtight container at room temperature.

2. Can I make it gluten-free?
Yes! Use a gluten-free flour mix, but the texture may vary slightly.

3. Is there a way to reduce the sweetness?
Cut down the sugar in the syrup or opt for a thinner coating.

4. Can I freeze Shakarpara?
You can freeze the dough, not the final product—it loses crispiness when thawed.

5. What’s the difference between sweet and savory Shakarpara?
Savory ones skip the syrup and include spices like ajwain and chili powder.

Sabudana Khichdi: A Delicious and Nutritious

Sabudana Khichdi

Introduction

Sabudana Khichdi is a popular Indian dish made from tapioca pearls (sabudana), peanuts, and mild spices. It is especially consumed during fasting seasons like Navratri, Mahashivratri, and Ekadashi. Light, gluten-free, and full of flavor, this dish is a favorite among health-conscious individuals and those looking for a quick and easy meal.

What is Sabudana?

Sabudana, also known as sago or tapioca pearls, is extracted from the roots of the cassava plant. It is rich in carbohydrates, making it an excellent energy booster. Commonly used in Indian cuisine, sabudana is a staple ingredient for fasting and detox diets.

  • Perfect for fasting – Sabudana khichdi is light on the stomach and adheres to Hindu fasting rules.
  • Quick to prepare – Requires minimal ingredients and can be made in under 30 minutes.
  • Versatile and delicious – Can be customized with spices, vegetables, and nuts.

Ingredients Required for Sabudana Khichdi

Main Ingredients:

  • 1 cup sabudana (tapioca pearls)
  • ½ cup peanuts (roasted and crushed)
  • 1 medium-sized potato (diced)
  • 1 green chili (chopped)
  • 1 teaspoon cumin seeds
  • 1 tablespoon ghee or oil
  • Salt (rock salt for fasting)
  • ½ teaspoon sugar
  • 1 tablespoon lemon juice
  • Fresh coriander leaves (chopped)

Optional Ingredients:

  • Grated coconut
  • Curry leaves
  • Black pepper

Step-by-Step Recipe for Perfect Sabudana Khichdi

Step 1: Soaking Sabudana

  • Wash the sabudana thoroughly until the water runs clear.
  • Soak in water (just enough to cover them) for 4-5 hours or overnight.
  • Drain excess water and let it sit for 30 minutes.

Step 2: Cooking the Spices and Peanuts

  • Heat ghee in a pan and add cumin seeds.
  • Add chopped green chilies and diced potatoes; cook until soft.
  • Stir in crushed peanuts for a crunchy texture.

Step 3: Mixing and Cooking the Khichdi

  • Add soaked sabudana, salt, and sugar to the pan.
  • Cook on low heat, stirring occasionally, until the pearls turn translucent.

Step 4: Garnishing and Serving

  • Squeeze lemon juice and sprinkle fresh coriander leaves.
  • Serve hot with yogurt or green chutney.

Common Mistakes and How to Avoid Them

  • Sticky sabudana? Soak them properly and drain excess water.
  • Hard sabudana? Allow them to rest after soaking.
  • Too dry? Add a splash of water while cooking.

Health Benefits of Sabudana Khichdi

  • Provides quick energy
  • Good for digestion
  • Gluten-free and easy on the stomach

Conclusion

Sabudana Khichdi is a delightful dish that blends taste with health benefits. Whether you’re fasting or just looking for a light yet filling meal, this dish is a must-try!

FAQs

  1. How long should I soak sabudana for khichdi?
    • At least 4-5 hours or overnight for the best texture.
  2. Can I make sabudana khichdi without peanuts?
    • Yes, you can skip peanuts or replace them with cashews.
  3. Is sabudana khichdi good for diabetics?
    • No, it has a high glycemic index and may spike blood sugar levels.
  4. Can I eat sabudana khichdi daily?
    • It’s high in carbs, so occasional consumption is recommended.
  5. What should I do if my sabudana turns sticky?
    • Rinse well before soaking and drain excess water before cooking.

Gobhi Paratha: A Step-by-Step Recipe for Beginners

Gobhi Paratha

    Introduction

    Gobhi Paratha is a delicious and nutritious Indian flatbread stuffed with spiced cauliflower. It’s a staple in North Indian households, loved for its crispy texture and flavorful filling. If you’re a beginner looking to make this dish, don’t worry! This guide will walk you through every step, ensuring you can make soft, flavorful parathas with ease.

    Ingredients Required

    For the Dough:

    • 2 cups whole wheat flour
    • ½ teaspoon salt
    • ¾ cup water (adjust as needed)
    • 1 teaspoon oil (optional)

    For the Stuffing:

    • 1 medium cauliflower (grated)
    • 1 teaspoon salt
    • ½ teaspoon red chili powder
    • ½ teaspoon turmeric powder
    • ½ teaspoon garam masala
    • 1 teaspoon coriander powder
    • 1 teaspoon cumin seeds
    • 1 green chili (finely chopped)
    • 2 tablespoons chopped cilantro
    • 1 teaspoon grated ginger

    How to Make the Dough

    1. In a large bowl, mix whole wheat flour and salt.
    2. Gradually add water and knead until a smooth dough forms.
    3. Add a teaspoon of oil and knead for 5 more minutes.
    4. Cover and let the dough rest for 30 minutes.

    Preparing the Gobhi Stuffing

    1. Wash and grate the cauliflower.
    2. Squeeze out excess water using a muslin cloth or hands.
    3. In a bowl, mix the grated cauliflower with all the spices, ginger, green chili, and cilantro.
    4. Ensure the mixture is dry and well-mixed.

    Stuffing and Rolling the Paratha

    1. Divide the dough into equal-sized balls.
    2. Roll one ball into a small disc and place 2 tablespoons of stuffing in the center.
    3. Seal the edges and flatten slightly.
    4. Roll again into a round shape, ensuring the filling doesn’t spill out.

    Cooking the Paratha on a Tawa

    1. Heat a tawa (flat pan) on medium heat.
    2. Place the rolled paratha on the hot tawa and cook for 1 minute.
    3. Flip and apply a little oil or ghee.
    4. Cook both sides until golden brown and crisp.

    Serving Suggestions

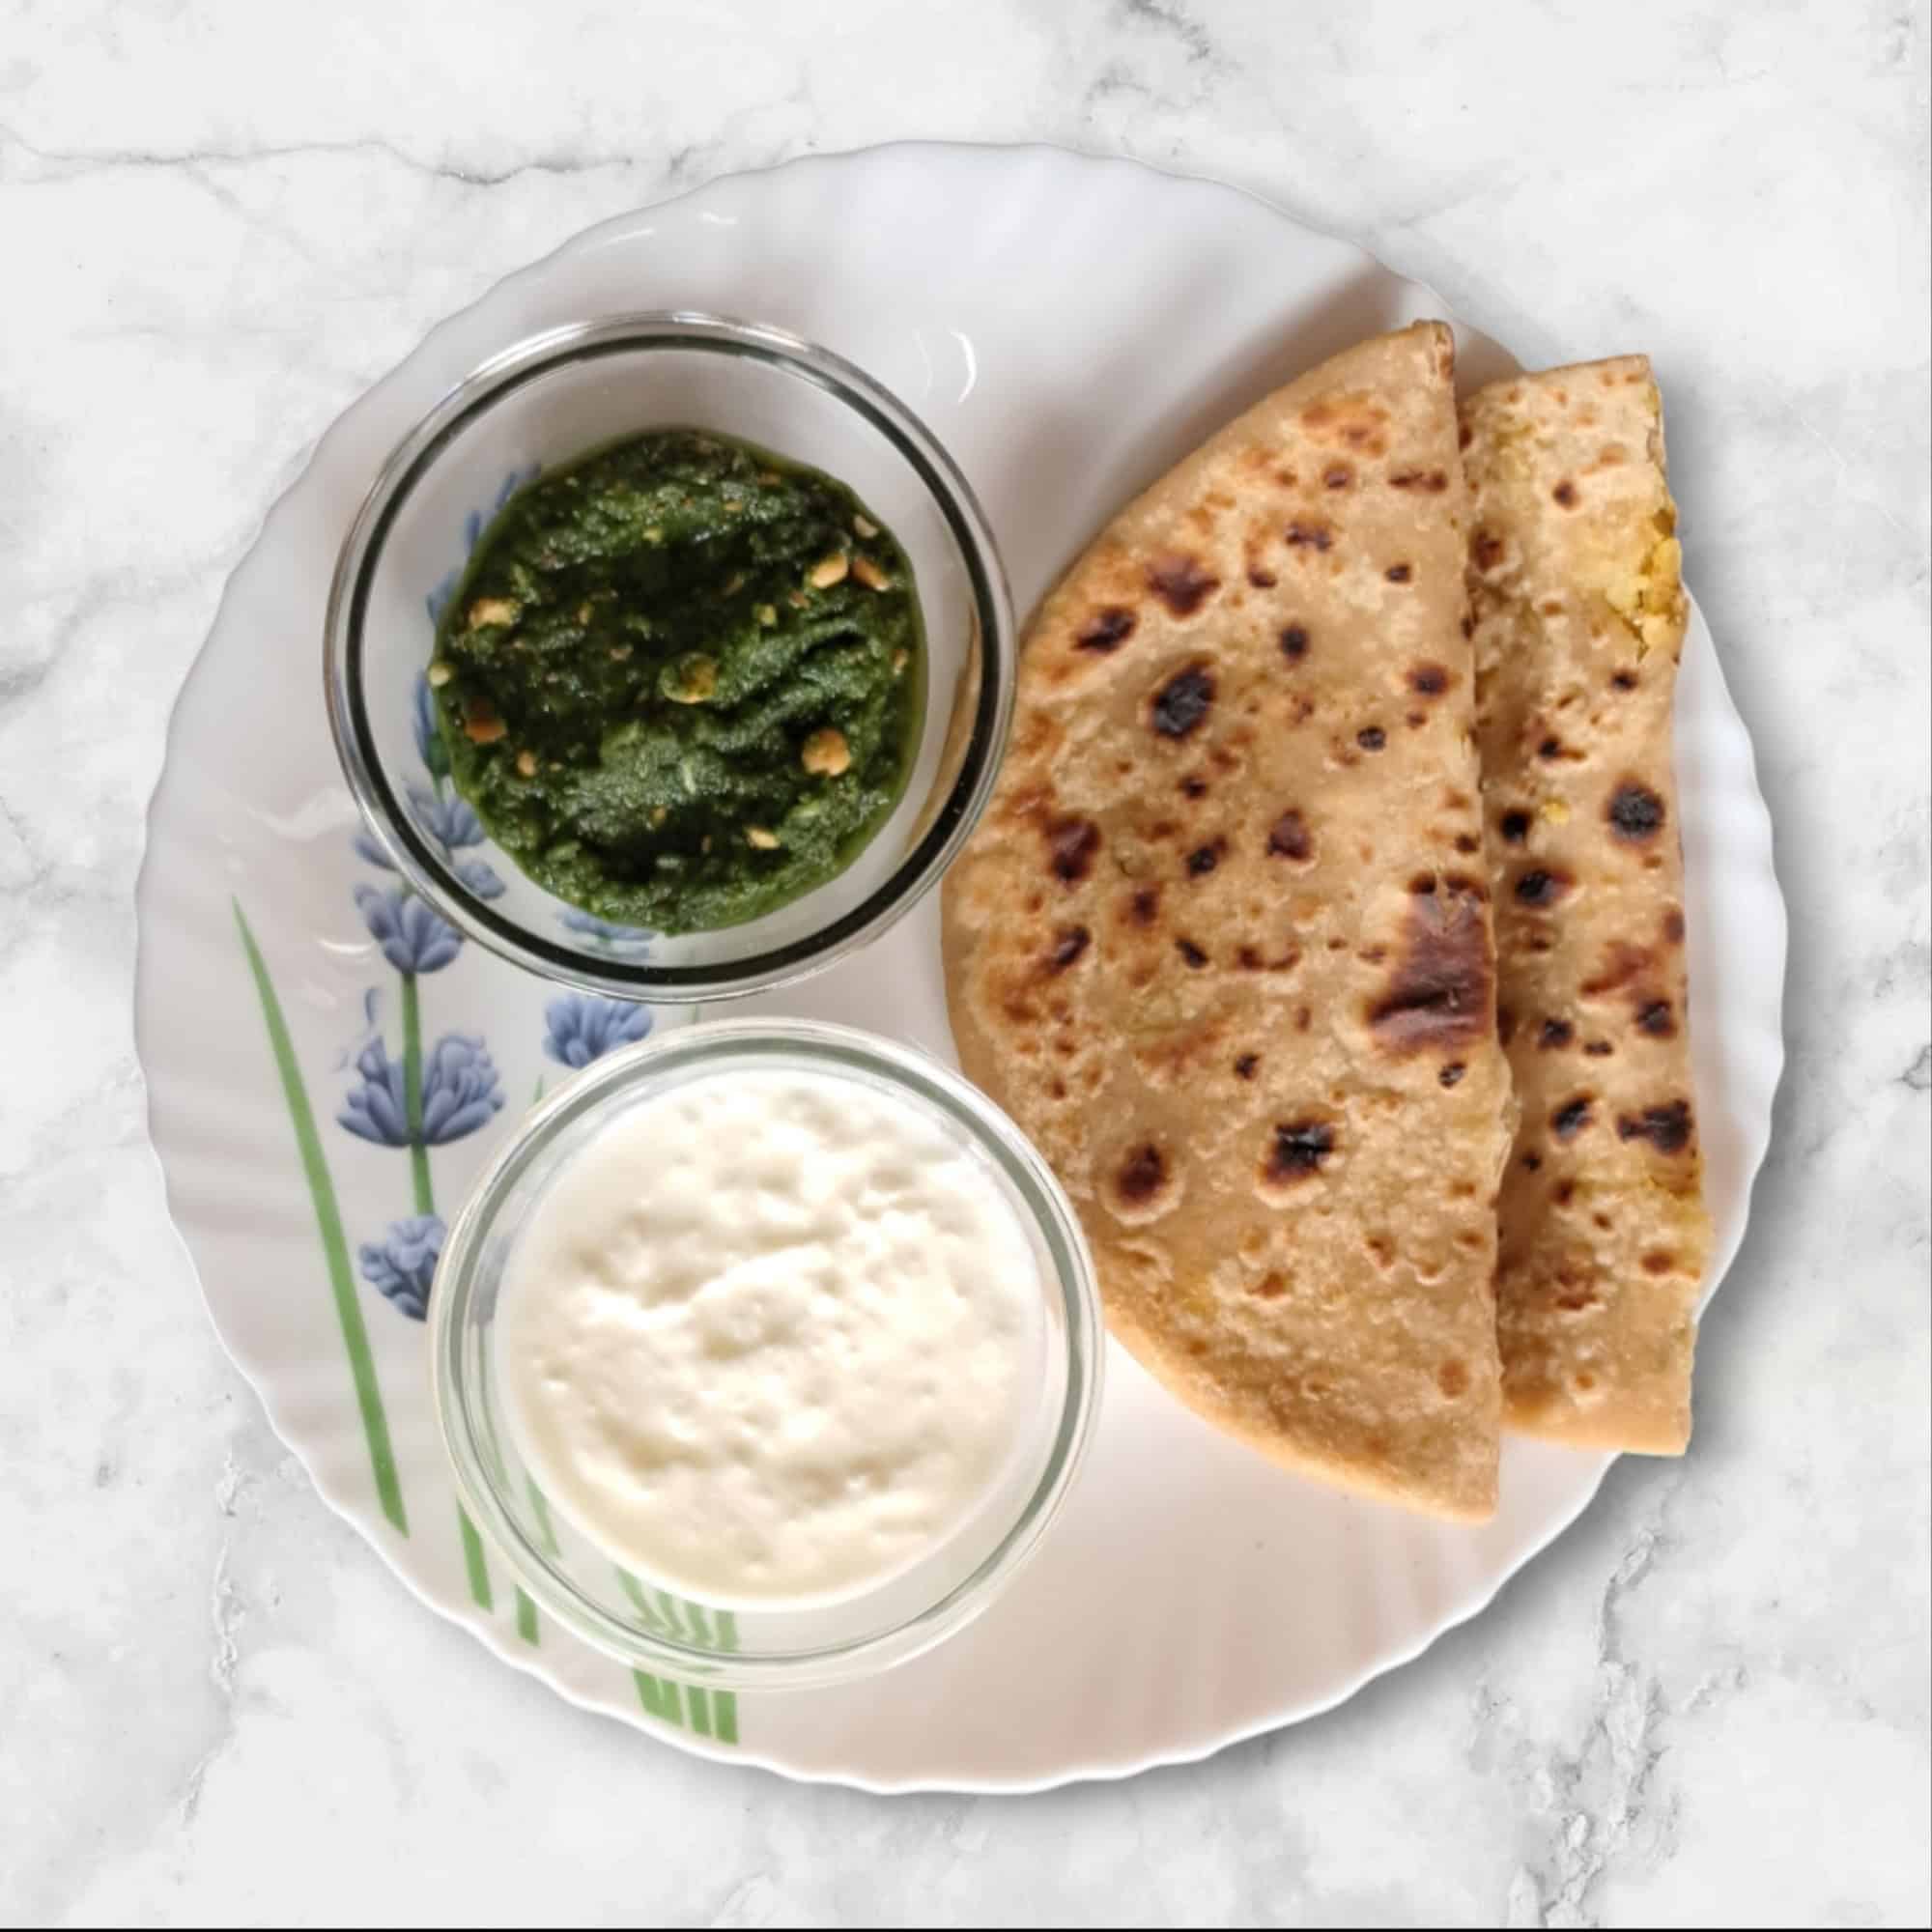
    • Serve hot with fresh yogurt, butter, or pickles.
    • Pair with a cup of masala chai for a perfect meal.

    Tips and Tricks for the Perfect Gobhi Paratha

    • Ensure the cauliflower stuffing is dry to prevent the paratha from tearing.
    • Use a hot tawa for even cooking.
    • Adjust spices to taste.
    • Experiment with adding cheese or paneer for extra flavor.

    Conclusion

    Making Gobhi Paratha at home is simple and rewarding. With the right techniques and ingredients, you can prepare delicious, crispy, and flavorful parathas in no time. Follow this guide, and you’ll soon master this classic North Indian dish!

    FAQs

    1. Can I make Gobhi Paratha without wheat flour?

    Yes! You can use multigrain flour, oat flour, or gluten-free alternatives.

    2. How do I store leftover parathas?

    Store them in an airtight container in the fridge for up to 2 days. Reheat on a tawa before serving.

    3. Can I use frozen cauliflower for stuffing?

    Yes, but ensure you thaw and squeeze out excess moisture before using.

    4. What other fillings can I try?

    You can experiment with paneer, radish (mooli), or potato (aloo) fillings.

    5. How do I make the parathas extra crispy?

    Cook on medium-high heat and apply a little extra ghee or butter while flipping.


    How to Bake the Perfect Plum Cake – Tips & Tricks!

    Plum cake

    Introduction:

    Plum cake is a rich, flavorful treat, often enjoyed during festive seasons. Whether you’re making a traditional Christmas plum cake or a moist, fruit-filled delight for any occasion, follow these steps to ensure a perfect bake every time!

    Ingredients You’ll Need:

    • 1 cup all-purpose flour
    • ½ cup unsalted butter (softened)
    • ½ cup sugar (brown or white)
    • 2 eggs
    • ½ cup yogurt or buttermilk
    • 1 teaspoon vanilla extract
    • 1 teaspoon baking powder
    • ½ teaspoon baking soda
    • 1 teaspoon cinnamon powder
    • ¼ teaspoon nutmeg powder
    • ½ cup chopped dried plums (or prunes)
    • ½ cup mixed dried fruits (raisins, cranberries, figs, etc.)
    • ¼ cup chopped nuts (walnuts, almonds, cashews)
    • 2 tablespoons orange juice or rum (for soaking dried fruits)
    • A pinch of salt

    Step-by-Step Instructions:

    1. Soak the Fruits

    • Soak dried plums and mixed fruits in orange juice or rum for at least 4 hours (or overnight for best results). This enhances flavor and keeps the cake moist.

    2. Prepare the Cake Batter

    • Preheat your oven to 170°C (340°F). Grease and line a baking pan.
    • In a bowl, cream butter and sugar until light and fluffy.
    • Add eggs one at a time, beating well after each addition.
    • Mix in vanilla extract and yogurt/buttermilk.

    3. Combine Dry Ingredients

    • In a separate bowl, sift flour, baking powder, baking soda, cinnamon, nutmeg, and salt.
    • Gradually fold the dry ingredients into the wet mixture, mixing gently to avoid overmixing.

    4. Add Fruits & Nuts

    • Toss the soaked fruits and nuts in a little flour (to prevent them from sinking).
    • Gently fold them into the batter.

    5. Bake the Cake

    • Pour the batter into the prepared cake tin. Smooth the top with a spatula.
    • Bake for 40-50 minutes or until a toothpick inserted in the center comes out clean.

    6. Cool & Serve

    • Let the cake cool in the pan for 10 minutes before transferring it to a wire rack.
    • Slice and enjoy with tea, coffee, or as a festive dessert!

    Tips & Tricks for a Perfect Plum Cake

    Use Good-Quality Fruits: Fresh, plump dried fruits add natural sweetness and moisture to the cake.

    Soak the Fruits Well: Soaking prevents dryness and adds depth to the flavor.

    Don’t Overmix: Overmixing can make the cake dense. Gently fold the ingredients for a light texture.

    Check for Doneness: Every oven is different, so always test with a toothpick before removing the cake from the oven.

    Store Properly: Wrap the cake in cling film or an airtight container to keep it moist for days.

    Now, you’re ready to bake the perfect plum cake! Enjoy baking and happy eating! 😊🍰

    Frequently Asked Questions (FAQs)

    1. Can I make plum cake without eggs?
      Yes! You can substitute eggs with mashed bananas, applesauce, or flaxseed meal (1 tablespoon flaxseed + 3 tablespoons water per egg). Yogurt or buttermilk also works well for a moist texture.
    2. How long should I soak the dried fruits?
      For the best flavor and moisture, soak the dried fruits overnight. However, if you’re short on time, soaking them for at least 4 hours in orange juice or rum will still enhance the taste.
    3. Why do my dried fruits sink to the bottom of the cake?
      To prevent this, coat the soaked fruits with a little flour before adding them to the batter. This helps distribute them evenly throughout the cake.
    4. How do I store plum cake to keep it fresh?
      Wrap the cake tightly in cling film or store it in an airtight container at room temperature for up to 3 days. For longer storage, refrigerate it for up to a week or freeze it for up to 3 months.
    5. Can I use fresh plums instead of dried plums?
      Yes, but fresh plums contain more moisture, which may slightly alter the cake’s texture. If using fresh plums, reduce the amount of liquid (yogurt/buttermilk) slightly to balance the moisture.

    Kadai Mushroom: The Ultimate Spicy & Flavour Dish

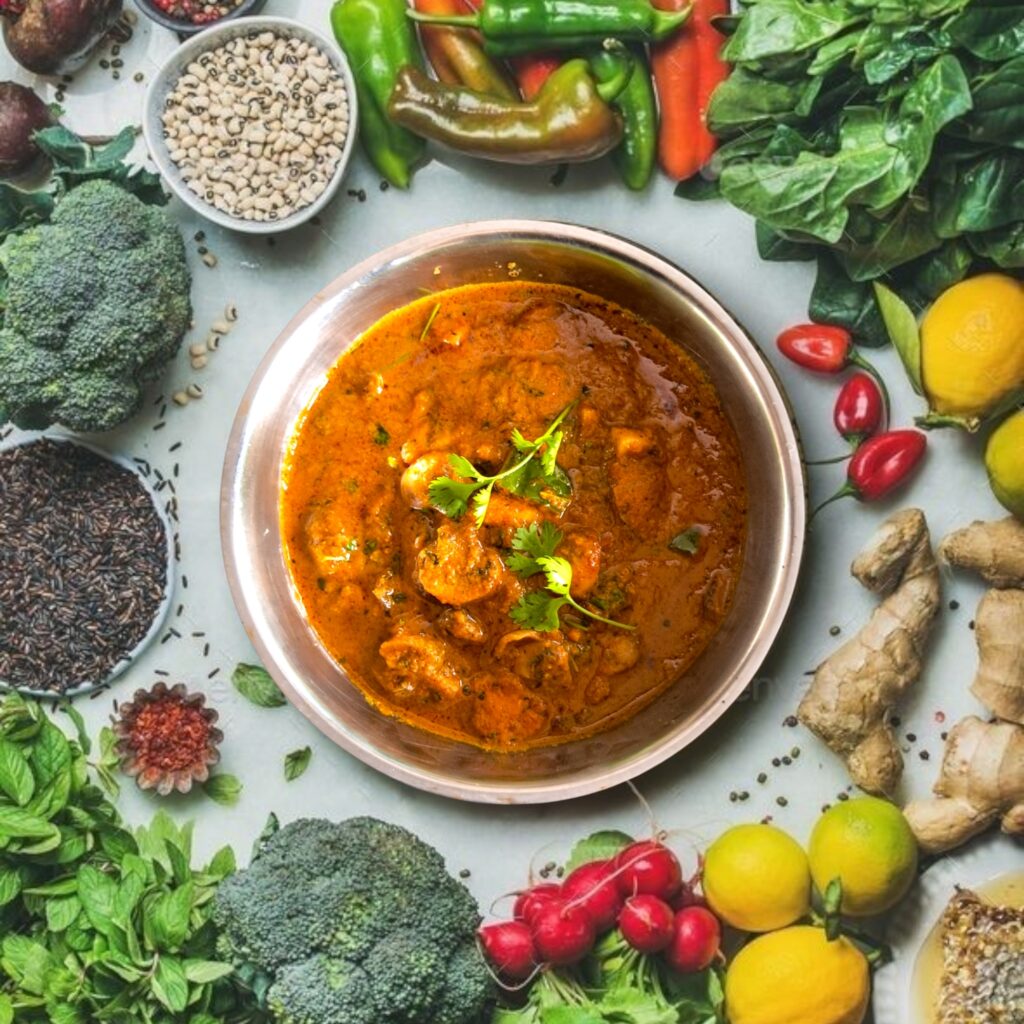
    Kadai Mushroom
    Kadai Mushrooms

    Introduction

    Kadai Mushroom is one of the most popular and flavorful Indian dishes, known for its rich, spicy, and aromatic taste. It is a perfect vegetarian delight that features mushrooms cooked in a special blend of spices, called Kadai mushroom, along with onions, tomatoes, and bell peppers. Whether you’re a fan of spicy food or just looking for a quick yet delicious meal, Kadai Mushroom is a must-try.

    Ingredients Required for Kadai Mushroom

    Main Ingredients:

    • 200g fresh mushrooms (button or cremini)
    • 1 large onion, sliced
    • 2 tomatoes, pureed
    • 1 green bell pepper, sliced
    • 2 tbsp oil or butter
    • 1 tsp cumin seeds
    • 1 tsp ginger-garlic paste

    Spice Blend:

    • 1 tsp red chilli powder
    • ½ tsp turmeric powder
    • 1 tsp coriander powder
    • ½ tsp garam masala
    • 1 tsp Kasuri methi (dried fenugreek leaves)
    • Salt to taste

    Optional Add-ons:

    • Paneer for a richer version
    • Cashew cream for a vegan twist

    The Secret Behind Kadai Mushroom

    Kadai mushroom is what makes this dish unique. You can make it by dry roasting and grinding coriander seeds, dried red chillies, cumin, and black peppercorns. Homemade Kadai mushroom provides a fresher and more robust flavour than store-bought ones.

    Step-by-Step Cooking Instructions

    1. Heat oil in a pan and add cumin seeds.
    2. Sauté onions until golden brown, then add ginger-garlic paste.
    3. Add tomato puree and cook until the oil separates.
    4. Stir in the spice blend and mix well.
    5. Add sliced mushrooms and cook on high heat.
    6. Toss in bell peppers and stir-fry for a couple of minutes.
    7. Sprinkle garam masala and Kasuri methi before serving.

    Best Side Dishes for Kadai Mushroom

    • Indian Breads: Serve with naan, roti, or paratha.
    • Rice Pairings: Goes well with jeera rice or plain basmati rice.
    • Cooling Sides: A cucumber raita balances out the spice.

    Tips for Making Restaurant-Style Kadai Mushroom at Home

    • Use fresh mushrooms for the best texture.
    • Cook on high heat to maintain the crunchiness of bell peppers.
    • Don’t overcook mushrooms, or they will release too much water.

    Common Mistakes to Avoid

    • Overcrowding the pan: Mushrooms should be stir-fried, not steamed.
    • Too much liquid: Kadai Mushroom is a semi-dry dish, so avoid adding excess water.
    • Incorrect spice balance: Always taste and adjust as needed.

    Conclusion

    Kadai Mushrooms are a perfect blend of spice, texture, and aroma. Whether you’re making them for a family dinner or a weekend treat, this dish is sure to impress. With the right balance of spices and proper cooking techniques, you can recreate the magic of restaurant-style Kadai Mushrooms at home!

    FAQs

    1. Can I make Kadai mushrooms without onions and garlic?
    Yes! Simply skip the onions and garlic and enhance the flavour with asafoetida (hing) and more tomatoes.

    2. What is the best type of mushroom to use for this dish?
    Button mushrooms are the most common, but cremini mushrooms work great too.

    3. How long does it take to cook Kadai mushrooms?
    From prep to plate, it takes about 30 minutes.

    4. Can I make this dish in advance?
    Yes, you can store it in the fridge for up to 2 days.

    5. What’s the difference between Kadai Mushroom and Mushroom Masala?
    Kadai Mushroom is semi-dry and cooked with bell peppers, while Mushroom Masala has a creamy gravy.

    Crispy Chilli Babycorn: A Quick Appetizer

    Crispy Chilli Babycorn

    Introduction

    Crispy Chilli Babycorn: A Quick Appetizer is a crowd-pleasing appetizer that combines crunch, spice, and a burst of flavors in every bite. Perfect for parties, gatherings, or a simple evening snack, this dish is not just delicious but also incredibly easy to make at home.

    Why You’ll Love This Recipe

    • Quick & easy to prepare
    • Uses simple pantry ingredients
    • A perfect balance of spicy, tangy, and crunchy
    • Great for vegetarians and kids alike
    • Can be customized to suit your taste

    Ingredients Needed

    For Frying the Babycorn:

    • 200g babycorn (cut into halves)
    • ½ cup all-purpose flour
    • ¼ cup cornflour
    • ½ tsp baking soda
    • 1 tsp black pepper powder
    • ½ tsp salt
    • ½ tsp red chili powder
    • Water (as needed)
    • Oil (for deep frying)

    For the Chilli Sauce:

    • 1 tbsp oil
    • 1 tbsp garlic (minced)
    • 1 tbsp ginger (finely chopped)
    • 1 green chili (chopped)
    • 1 small onion (sliced)
    • ½ green bell pepper (sliced)
    • 2 tbsp soy sauce
    • 1 tbsp red chili sauce
    • 1 tbsp tomato ketchup
    • 1 tsp vinegar
    • 1 tsp sugar
    • Salt to taste
    • Spring onions (for garnish)

    Step-by-Step Cooking Instructions

    Step 1: Preparing the Babycorn

    • Wash and dry the babycorn thoroughly.
    • Cut them into halves if they are too long.

    Step 2: Making the Batter

    • In a bowl, mix all-purpose flour, cornflour, baking soda, salt, black pepper, and red chili powder.
    • Add water gradually to make a smooth batter (not too thick or thin).
    • Coat each babycorn piece evenly with the batter.

    Step 3: Frying the Babycorn

    • Heat oil in a pan over medium-high heat.
    • Deep fry the babycorn pieces until golden brown and crispy.
    • Remove and drain excess oil on a paper towel.

    Step 4: Preparing the Chilli Sauce

    • Heat 1 tbsp oil in a pan.
    • Add minced garlic, chopped ginger, and green chili. Sauté until fragrant.
    • Toss in onions and bell peppers, stir-fry for 2-3 minutes.
    • Add soy sauce, red chili sauce, tomato ketchup, vinegar, and sugar.
    • Mix well and cook until the sauce thickens slightly.

    Step 5: Tossing It All Together

    • Add the fried babycorn to the sauce.
    • Toss well until each piece is coated evenly.
    • Garnish with chopped spring onions and serve hot.

    Tips to Get the Perfect Crispiness

    • Always pat dry the babycorn before coating.
    • Use chilled water for the batter to make it extra crispy.
    • Double fry the babycorn for an ultra-crispy texture.
    • Serve immediately to maintain crunchiness.

    Variations to Try

    • Honey Chilli Babycorn – Add 1 tbsp honey for a sweet-spicy twist.
    • Garlic Butter Babycorn – Toss in melted butter and garlic instead of chili sauce.
    • Cheesy Babycorn – Sprinkle grated cheese before serving.

    Serving Suggestions

    • Serve as an appetizer with mint chutney or schezwan sauce.
    • Pair with fried rice or noodles for a complete meal.
    • Enjoy as a party snack with a refreshing beverage.

    Health Benefits of Babycorn

    • Low in calories, making it a guilt-free snack.
    • Rich in fiber, aiding digestion.
    • Contains essential vitamins and minerals like Vitamin C and B-complex.
    • A great source of antioxidants.

    Common Mistakes to Avoid

    • Soggy Babycorn – Avoid adding too much water to the batter.
    • Not Draining Oil Properly – Always use a paper towel to soak excess oil.
    • Overcooking in Sauce – Toss quickly to retain crispiness.

    Frequently Asked Questions (FAQs)

    1. Can I make this dish ahead of time?

    It’s best enjoyed fresh, but you can fry the babycorn in advance and toss in sauce before serving.

    2. Can I air-fry instead of deep-frying?

    Yes! Preheat the air fryer to 200°C (392°F) and cook for 10-12 minutes, shaking halfway.

    3. What can I use instead of all-purpose flour?

    You can use rice flour or chickpea flour for a gluten-free option.

    4. How do I make it less spicy?

    Reduce the amount of chili sauce and green chilies to make it milder.

    5. Can I store leftovers?

    Yes, store in an airtight container and reheat in an oven for best results.

    How To Make Grilled Paneer Tikka At Home

    Grilled Paneer Tikka

    Introduction

    Craving something smoky, spicy, and utterly delicious? Then Grilled Paneer Tikka is exactly what you need! This Indian delicacy is packed with bold flavors, a creamy texture, and that signature charred taste that makes it an all-time favorite.

    History of Paneer Tikka

    Paneer Tikka has deep roots in Indian cuisine. Traditionally cooked in a tandoor (clay oven), it originated in North India and has evolved into a popular appetizer enjoyed worldwide. Today, it is adapted to suit various cooking methods, including grilling and baking.

    Why You Should Try Grilled Paneer Tikka

    • Healthy & Nutritious – Packed with protein and calcium, making it a great choice for vegetarians.
    • Easy to Prepare – Requires simple ingredients and minimal effort.
    • Bursting with Flavor – The perfect blend of spices, yogurt, and smoky goodness.
    Paneer Tikka
    Onion and Capsicum

    Ingredients Needed for Grilled Paneer Tikka

    Primary Ingredients:

    • 250g paneer (Indian cottage cheese), cut into cubes
    • 1/2 cup thick yogurt
    • 1 tbsp ginger-garlic paste
    • 1 tsp red chili powder
    • 1/2 tsp turmeric powder
    • 1 tsp garam masala
    • 1 tsp cumin powder
    • 1 tbsp lemon juice
    • 1 tbsp mustard oil
    • 1 tbsp gram flour (besan)
    • 1 capsicum (bell pepper), chopped
    • 1 onion, cut into squares
    • 1 tomato, cut into squares
    • Salt to taste

    Step-by-Step Recipe for Grilled Paneer Tikka

    1. Preparing the Marinade

    • In a bowl, mix yogurt, ginger-garlic paste, lemon juice, mustard oil, and all spices.
    • Add gram flour for better texture.
    • Mix well to form a smooth paste.

    2. Marinating the Paneer

    • Coat the paneer cubes, onion, capsicum, and tomatoes with the marinade.
    • Let it rest for at least 30 minutes (overnight for best results).

    3. Grilling the Paneer

    • Preheat a grill or pan.
    • Skewer the marinated paneer and vegetables.
    • Grill for 8-10 minutes, turning occasionally.
    • Brush with butter for extra flavour.

    Tips for the Best Grilled Paneer Tikka

    • Use fresh paneer for a soft, creamy texture.
    • Do not over-marinate, as it can make paneer too soft.
    • Grill on medium-high heat for a perfect char.

    Different Ways to Cook Paneer Tikka

    • BBQ Grill: Best for a smoky, authentic taste.
    • Stovetop Grill Pan: A quick and easy method.
    • Oven: Bake at 200°C (392°F) for 15-20 minutes.

    Serving Suggestions

    • Serve hot with mint chutney and onion rings.
    • Pair with naan, roti, or enjoy as a standalone snack.

    Nutritional Benefits of Paneer Tikka

    • High in Protein: Great for muscle building.
    • Rich in Calcium: Good for bone health.
    • Low in Carbs: A healthy snack choice.

    Best Occasions to Enjoy Grilled Paneer Tikka

    • Family gatherings
    • Weekend BBQ parties
    • Festive celebrations

    Conclusion

    Grilled Paneer Tikka is a must-try dish for anyone who loves bold flavours with a smoky twist. It’s easy to make, packed with nutrients, and absolutely delicious!

    FAQs

    1. Can I use tofu instead of paneer?

    Yes! Tofu is a great vegan alternative.

    2. How do I get a smokier flavour?

    Use the dhungar method (smoking with a piece of charcoal).

    3. Can I make Paneer Tikka without a grill?

    Absolutely! Use an oven or stovetop pan.

    4. How long can I store leftover Paneer Tikka?

    Store in an airtight container in the fridge for 2-3 days.

    5. What is the best dip for Paneer Tikka?

    Mint-coriander chutney is the perfect companion!