How to Make Butter Chicken That Rivals Your Favorite Takeout

Butter Chicken Masala

Butter chicken. Just saying the name makes your mouth water, doesn’t it? This iconic dish from Indian cuisine, also known as murgh makhani, is beloved for its creamy, spiced tomato-based sauce and tender, flavorful chicken. But what if I told you that you don’t need to rely on takeout to get your butter chicken fix? You can make this restaurant-quality dish right in your own kitchen!

This easy butter chicken recipe will guide you step by step, so whether you’re a seasoned home cook or a beginner, you’ll end up with a dish that’s bursting with flavor, perfectly balanced, and absolutely drool-worthy.

Here’s everything you need to know about how to make butter chicken, including a few pro tips to take your recipe to the next level.

Butter Chicken

What Is Butter Chicken?

Before we get cooking, let’s break it down. What is butter chicken, exactly?

It’s not as heavily spiced as some other Indian curries but still packs a punch with warming flavors like garam masala, turmeric, ginger, and garlic. Its richness comes from butter, cream, and the cooked-down tomatoes that create a velvety-smooth sauce.

Now, are you ready to roll up your sleeves and recreate this buttery masterpiece?

Why Make Butter Chicken at Home?

There are so many reasons to whip up your own butter chicken instead of waiting for the delivery guy!

Butter chicken originated in Delhi, India, back in the 1950s. It was created by chefs at the Moti Mahal restaurant, who used leftover tandoori chicken and combined it with a tomato-based gravy enriched with butter and cream. The result? Pure magic in a bowl.

  • Healthier than takeout: You control the ingredients, so you can make it lighter if you want without sacrificing flavor.
  • Saves money: Butter chicken from a good restaurant isn’t cheap. Making it at home costs a fraction of the price.
  • Customizable: Want it spicier? Milder? Dairy-free? You can tweak recipes to suit your preferences.
  • Impress your friends! Seriously, who wouldn’t swoon over homemade butter chicken?

How to Make Butter Chicken in 6 Simple Steps

1. Marinate the Chicken to Maximize Flavor

The key to tender, flavorful chicken is a great marinade. Here’s what you’ll need for your marinade:

  • Boneless, skinless chicken thighs or breasts
  • Yogurt (acts as a tenderizer and adds tanginess)
  • Garlic and ginger paste
  • Spices like turmeric, cumin, coriander, and garam masala
  • A squeeze of lemon juice

Mix everything together, coat the chicken well, and let it sit for at least 2-3 hours (overnight is even better). Trust me, the longer it sits, the more flavorful your chicken will be.

Pro tip: If you’re short on time, even a 30-minute marinade will work wonders.

2. Cook the Chicken Until Slightly Charred

Traditionally, butter chicken is made with tandoori chicken, which is cooked in a clay oven. At home, you can use a hot skillet, grill pan, or even an air fryer to get a similar char on the chicken.

Sear the marinated chicken until it’s slightly crispy on the outside but not fully cooked through (it will finish cooking in the sauce later). Remove it from the pan and set it aside.

3. Make the Signature Creamy Tomato Sauce

Here’s where the magic happens! You’ll need a handful of pantry staples to create that rich, velvety butter chicken sauce.

Ingredients for the sauce:

  • Butter (of course!)
  • Garlic and ginger paste
  • Canned tomato puree or fresh crushed tomatoes
  • Spices like garam masala, chili powder, and a hint of sugar for balance
  • Heavy cream or coconut milk for creaminess

Melt butter in the same pan you used for the chicken, then sauté the garlic and ginger until fragrant. Add the spices, followed by the tomato puree. Cook this down for 10-15 minutes until it thickens slightly and deepens in color.

Stir in cream or coconut milk and taste for seasoning. Adjust with salt, sugar, or chili powder as needed.

4. Combine the Chicken and Sauce

Now comes the best part. Add your seared chicken back to the pan and simmer gently. This allows the chicken to finish cooking and soak up all the flavors of that incredible sauce.

Cook until the chicken is tender and infused with the spices, about 10-12 minutes.

5. Garnish for Maximum Presentation

No butter chicken is complete without a little garnish. Add a dollop of cream, a sprinkle of fresh cilantro, or a few slivers of ginger on top for a pop of color and flavor.

Visual appeal matters! A pretty plate makes the dish even more inviting.

6. Serve and Savor

Butter chicken is best enjoyed with basmati rice or warm naan bread to soak up every last drop of that luscious sauce. What’s your pick? Rice or naan? Or both? (No judgment here.)

Pro Tips

  • Use ghee instead of butter for a more authentic flavor.
  • Spice it up with a pinch of cayenne if you like extra heat.
  • Go dairy-free by substituting coconut milk for cream and vegan butter for regular butter.
  • Make it ahead of time. Butter chicken tastes even better the next day as the flavors deepen.

Why This Is the Best Simple Butter Chicken Recipe

Whether you’re cooking for a crowd or treating yourself to some homemade comfort food, this easy butter chicken recipe ticks all the boxes. It’s flavorful, creamy, and surprisingly simple to prepare.

Plus, the flexibility to adjust ingredients and spice levels makes it ideal for both butter chicken purists and adventurous foodies looking to try something new.

Start Cooking Your Butter Chicken Today

Now that you know how to make butter chicken, it’s time to head to your kitchen and get cooking. Trust us, your taste buds will thank you.

If you loved this recipe, don’t keep it a secret! Share it with your fellow foodies and tag us on social media when you make it. We’d love to see your delicious creations. Happy cooking!

FAQ

What is the best cut of chicken to use for butter chicken?

Boneless, skinless chicken thighs are preferred because they stay juicy and tender. However, chicken breasts can also be used if you prefer leaner meat—just be careful not to overcook them.

How long should I marinate the chicken for best flavor?

For optimal flavor, marinate the chicken for at least 2–3 hours. Marinating overnight enhances the taste even more. If you’re in a rush, a 30-minute quick marinade will still yield good results.

Can I make butter chicken dairy-free or vegan?

Absolutely! Swap heavy cream with coconut milk and use vegan butter instead of dairy butter. For a vegan version, replace the chicken with tofu or paneer alternatives like soy chunks.

Is butter chicken very spicy? Can I adjust the heat level?

Butter chicken is moderately spiced, but not overly hot. You can easily reduce or increase the chili powder or garam masala to adjust the spice level to your taste.

What are the best side dishes to serve with butter chicken?

Butter chicken pairs wonderfully with basmati rice, naan, or jeera rice. These sides soak up the creamy, spiced tomato sauce perfectly, making each bite even more satisfying.


Read more: How to Make Butter Chicken That Rivals Your Favorite Takeout

Mastering Tandoori Chicken The Easy Way

Tandoori Chicken

Imagine the warm aroma of earthy spices wafting through your kitchen as vibrant, golden-orange chicken grills to perfection. Tandoori chicken, with its smoky flavors and succulent texture, has enchanted taste buds for generations. This iconic Indian dish, served at world-class restaurants and family dinners alike, is much easier to master at home than you might think.

Yet, many home cooks struggle to replicate the juicy tenderness and signature char associated with authentic tandoori chicken. That’s where this guide comes in! Today, you’ll learn everything from crafting the perfect marinade to cooking techniques (oven or no oven) and expert tips to elevate your dish. By the end of this blog, you’ll be ready to impress your friends and family with restaurant-quality tandoori chicken.

full tandoori chicken

Understanding the Essence of Tandoori Chicken

A Brief History

Tandoori chicken originated in the Punjab region before the partition of India and Pakistan. Popularized in Delhi by Kundan Lal Gujral at his famous Moti Mahal restaurant, this dish marked the innovation of pairing marinated chicken with the tandoor, a traditional clay oven. Over time, the recipe gained a global following for its irresistible flavors and unique cooking process.

Key Features

  • Smoky Flavor: The hallmark of authentic tandoori chicken is its smoky essence, traditionally achieved in a tandoor oven.
  • Vibrant Appearance: Its distinctive orange hue comes from spices like turmeric, paprika, or even Kashmiri chili powder.
  • Tender Texture: Thanks to a yogurt-based marinade, the chicken remains juicy and flavorful on the inside, with a slightly charred exterior.

Tandoori chicken isn’t just food; it’s a sensory experience, steeped in tradition and culture.

The Magic of Tandoori Chicken Marinade

The secret to mouthwatering tandoori chicken lies in its marinade. This blend of ingredients transforms simple chicken into a masterpiece bursting with flavor.

Essential Marinade Components

  • Yogurt: The foundation of any tandoori marinade, yogurt tenderizes the chicken and keeps it moist during cooking.
  • Spices: Garam masala, red chili powder, turmeric, and cumin are the stars, each contributing layers of earthy heat and color.
  • Aromatic Additions: Ginger, garlic, and lemon juice add brightness and depth.
  • Oil: Helps retain moisture and enhances the flavors while cooking.

Tips for the Best Marinade

  • Use full-fat yogurt for creamier consistency.
  • Adjust chili powder to your preferred spice level.
  • Marinate the chicken for at least 4 hours, but overnight yields the best results.
  • For beginners, start with the classic yogurt-based version. Feeling adventurous? Try a spicy green marinade made with cilantro, mint, and green chilies for a refreshing twist.

Pro Tip: For the perfect tandoori chicken marinade, yogurt works wonders in tenderizing the meat while balancing spices for a rich flavor profile.

Selecting Your Chicken Cuts

Tandoori chicken works well with a variety of cuts, each offering a unique texture and taste.

  • Drumsticks and Thighs: Ideal for juicy results, as dark meat retains moisture better.
  • Chicken Breasts: A leaner option but still delicious if cooked carefully to avoid drying out.
  • Wings: Fantastic for appetizers or snacks.
  • Vegetarian/Vegan Options: Paneer or tofu can also soak up the marinade and deliver equally delightful results.

Prep Like a Pro

  • Score the chicken pieces with shallow cuts. This allows the marinade to seep in, ensuring even flavor and tenderness.
  • Pat the chicken dry with a paper towel before marinating to help the spices adhere better.

Cooking Your Tandoori Chicken

Option 1: Making Tandoori Chicken in an Oven

An oven makes it surprisingly easy to replicate the results of a traditional tandoor.

  1. Preheat your oven to 400°F (200°C).
  2. Place the marinated chicken on a baking tray lined with foil to catch drippings.
  3. Bake for 25-30 minutes, flipping halfway through.
  4. For that signature char, broil the chicken for 2-3 minutes at the end while keeping a close eye on it.

Pro Tip: Brush the chicken with additional marinade halfway through baking for extra moisture and flavor.

Option 2: How to Make Tandoori Chicken Without an Oven

No oven? No problem! Here are other methods to get equally delicious results:

  • Grill Pan or BBQ: Preheat the grill pan to medium-high heat and add a bit of oil to prevent sticking. Grill the chicken for about 20 minutes, turning occasionally.
  • Air Fryer: Cook the chicken pieces in an air fryer basket at 375°F (190°C) for 20 minutes. The circulating heat ensures even cooking.
  • Dhungar Method: Want an authentic smoky flavor? Place a heated charcoal piece in a bowl with the cooked chicken, drizzle a few drops of oil on the coal, and immediately cover with a lid. The smoke will infuse the chicken in minutes!

Wondering how to make tandoori chicken without an oven? A grill pan or even an air fryer can deliver equally mouthwatering results.

Pairing Tandoori Chicken With Classic Sides

What’s tandoori chicken without the perfect accompaniments?

  • Mint Chutney: Its refreshing coolness complements the spiced chicken perfectly.
  • Naan Bread or Rice: Starch options to soak up every last drop of flavor.
  • Onion Slices and Lemon Wedges: Elevate the dish with a burst of acidity.
  • Raita: A yogurt dip to balance the heat.
  • Beverage Pairings: Pair with a crisp lager, fruity white wine, or a mango lassi for a complete experience.

Expert Tips for Perfect Tandoori Chicken Every Time

  1. Always preheat your grill, pan, or oven to ensure an even cooking surface.
  2. Use a meat thermometer to confirm the chicken reaches an internal temperature of 165°F (74°C).
  3. For extra richness, experiment with additions like saffron or a drizzle of melted butter before serving.
  4. Start with mild spices and gradually increase as you grow more confident.

Bring Tandoori Magic to Your Home Kitchen

Mastering tandoori chicken is easier than you think. With the right marinade, selected cuts, and flexible cooking methods, you can recreate the magic of an authentic Indian dish in your own kitchen. Whether it’s a weekday dinner for your family or a feast with friends, this recipe will make you the star of the table.

Why not give it a try? Share your tandoori creations with us on facebook by tagging indiankitchenflavour and #TandooriAtHome! Looking for more culinary inspiration? Subscribe to our newsletter for exclusive recipes and pro kitchen tips delivered straight to your inbox.

5 Secrets About Best Eggless Chocolate Cake Recipe That Will Blow Your Mind

Best Eggless Chocolate Cake Recipe

Think all the best eggless chocolate cake recipe are dry, dense, or lacking flavour? Think again. Get ready for five game-changing secrets that will transform the way you bake!

Whether you’re managing dietary restrictions, dealing with egg allergies, or simply out of eggs, creating a rich and moist chocolate cake without them is entirely possible. Desserts that are egg-free don’t have to compromise on taste, texture, or indulgence. This blog isn’t just about recipes; we’re here with baking secrets that elevate any eggless chocolate cake to gourmet-level goodness.

By the end of this post, you’ll have all the pro insights to bake the best eggless chocolate cake. Plus, these tips are so satisfying, they’ll make you want to grab your apron right after reading!

Moisture Without Eggs

One of the biggest misconceptions about eggless baking is that the cakes come out dry or crumbly. But that’s far from the truth when you know how to lock in moisture.

Baking Secret

Substitute eggs with ingredients that double as flavor enhancers and moisture lock-ins. Some foolproof favorites include:

  • Greek yogurt works wonders by creating a rich texture while ensuring the cake is moist.
  • Mashed bananas or applesauce are classics for a subtle fruity undertone.
  • Buttermilk gives that slight tang while keeping the crumb soft.

Real-World Example

Want to see this in action? Try replacing two eggs with ½ cup Greek yogurt in your recipe. The result is a perfectly dense, moist chocolate cake that holds its structure while melting in your mouth.


Making Flavors Stand Out

Chocolate is the star of a chocolate cake, eggless or not. But oftentimes, cocoa powder can taste flat in recipes without the right flavor enhancers.

Baking Secret

  • Add a splash of brewed coffee to deepen the chocolatey goodness.
  • Toast your cocoa powder briefly before mixing it into the batter to enhance its natural richness.
  • Don’t skip the pinch of salt – it intensifies sweetness without overpowering the other flavors.

Pro Tip

Pair your cocoa powder with vanilla extract for a flavor balanced just right. Even better, opt for high-quality dark cocoa powder to bring out complex notes in the cake.


The Power of Leavening Agents

Skip the eggs, and you’ll need to replace their magical role in helping cakes rise and stay fluffy. Without eggs, cakes run the risk of being flat, dense, or feeling heavy.

Baking Secret

  • Combine baking soda and vinegar in your batter. The fizzy reaction lightens the texture and creates lift.
  • Use self-rising flour or double the dose of your regular baking powder (following recipe specifics to avoid errors).

Why it Works

Baking soda reacts with acidic ingredients like vinegar, yogurt, or buttermilk, creating those sought-after airy pockets that make cakes soft yet structured.


Getting the Perfect Texture Every Time

Eggless chocolate cake recipes sometimes lead to gummy textures or heavy crumbs. But the fix is easy with a few baking tricks.

Baking Secret

  • Sift your dry ingredients well to eliminate any clumps and evenly distribute your leavening agents.
  • Balance your fats carefully. While oil gives cakes moisture, adding too much can result in an overly greasy texture. Opt for a mix of butter and oil.

Additions That Shine

Next time, toss some small fudge chunks into your batter. They’ll melt in pockets, turning your cake into a heavenly treat. Alternatively, mix a bit of almond flour into the batter for an airy, light crumb that feels like biting into clouds.


Gourmet Tasting Notes

Elevate your cake from homemade to bakery-quality by exploring flavor pairings. Think of your eggless chocolate cake as a blank canvas for premium ingredients and creative finishes.

Baking Secret

  • Use high-quality chocolate or rich cocoa powder to give the cake a luxurious profile.
  • Pair the cake with complementary gourmet flavors like raspberry coulis, hazelnut milk, or a touch of orange zest in the batter.
  • Experiment with textures by sprinkling flakes of sea salt just before serving to create a harmonious balance between sweet and savory.

Example Combo

Bake a moist eggless chocolate cake and serve it alongside a drizzle of raspberry coulis and a dollop of whipped cream. The contrast between the tartness and the chocolate’s depth will leave everyone speechless.


Foolproof Baking Tricks

best eggless chocolate cake recipe, while delicious, can occasionally be tricky for first-timers. Avoid common mishaps with these expert tips that guarantee bakery-worthy results!

Baking Secret

  • Always preheat your oven to ensure even baking.
  • Avoid overmixing your batter to prevent activating too much gluten (which can make cakes tough).
  • Line your baking pan with parchment paper for an easy removal process and razor-sharp edges.

Myth Buster

Myth: Eggless cakes can’t be as indulgently rich as egg-based ones.

Truth: Ingredients like avocado, silken tofu, and cream cheese can take your cake’s richness to new heights while keeping everything egg-free and delicious!


best eggless chocolate cake recipe

Which Secret Will You Try First?

Eggless chocolate cakes hold endless possibilities for innovation and flavor! Whether you’re experimenting with yogurt for moisture, brewed coffee for richness, or baking soda for a flawless rise, these secrets are your go-to guide for the ultimate baking glow-up.

Baking without eggs doesn’t mean compromising. With smart substitutions and a little creativity, you can whip up rich, flavorful chocolate cakes that’ll rival the best egg-based ones.

Your turn! Which of these tips are you going to try first? Bake your best eggless chocolate cake recipe, and share your success story with us. We’d love to see your creations!

Best eggless chocolate cake Recipe: Frequently Asked Questions

Can eggless chocolate cakes really be moist and fluffy?

Yes! Eggless cakes can be incredibly moist and fluffy if you use the right substitutes. Ingredients like Greek yogurt, applesauce, mashed bananas, and buttermilk help lock in moisture and improve texture — no eggs needed.

What’s the best way to make eggless chocolate cake rise well?

Use a combo of baking soda and an acidic ingredient like vinegar, yogurt, or buttermilk. This creates a fizzy reaction that gives the cake lift and softness. You can also use self-rising flour or adjust baking powder as needed.

How can I enhance the chocolate flavor in an eggless cake?

Boost your chocolate game with a splash of brewed coffee, a pinch of salt, and toasted cocoa powder. These intensify the richness of cocoa. Don’t forget to use good-quality dark cocoa or chocolate for gourmet-level taste.

What should I do to avoid dense or gummy texture in eggless cakes?

Sift your dry ingredients, balance your fats (don’t overdo the oil), and avoid overmixing the batter. You can also add a little almond flour for a lighter crumb or mix in chocolate chunks for gooey texture surprises.

Are there any creative flavor pairings for eggless chocolate cakes?

Absolutely! Try serving your cake with raspberry coulis, orange zest, or hazelnut milk for a gourmet touch. Sprinkling sea salt flakes just before serving adds a delicious sweet-salty contrast.

Why Hyderabad Biryani Is More Than Just Food: It’s a Cultural Phenomenon

Hyderabad Biryani

No culinary conversation in India is complete without paying homage to Hyderabad Biryani. This iconic dish is more than a delectable blend of rice, spices, and meat; it’s an experience deeply woven into the cultural fabric of Hyderabad and cherished by food lovers worldwide. Whatever your connection to food may be—as a busy parent, passionate foodie, or someone exploring the nuances of local cuisine—Hyderabad Biryani offers more than just flavor; it’s a story, a tradition, and an emotion.

What Makes Hyderabad Biryani Special?

Hyderabad Biryani isn’t just a meal, it’s a masterpiece. The roots of this beloved dish intertwine with the city’s royal history, blending Mughlai culinary traditions and local Telugu flavors. The result? A symphony of spices that surprises the palate and woos the soul.

This dish typically comes in two distinct types:

  • Kacchi Biryani: Marinated raw meat is layered with partially cooked rice and slow-cooked together, soaking up rich flavors.
  • Pakki Biryani: Fully cooked meat is layered with cooked rice, making it quicker yet equally flavorful.

What truly sets Hyderabad Biryani apart is its signature dum cooking technique, where the rice and meat are sealed in a pot to steam together. This method locks in flavors, creating a fragrant, flavorful dish that is hard to replicate anywhere else.

Why Hyderabad Biryani Is a Cultural Phenomenon

It Represents Heritage and History

Hyderabad Biryani traces back to the Nizams of Hyderabad, who elevated it from a simple dish to a royal delicacy. Over generations, the recipe has evolved while still remaining a symbol of the city’s rich heritage, where culinary craftsmanship was taken to unparalleled heights.

A Uniting Force

Biryani brings people together like few other dishes can. Whether shared at a family gathering, served at a wedding, or enjoyed during festivals, it holds sentimental value. It’s not uncommon to see people from vastly different cultural backgrounds bonding over a shared love for Hyderabad Biryani.

A Sense of Ownership

For Hyderabadis, this isn’t just food; it’s an identity. Every local has an opinion on the “best spot” to enjoy it, whether it’s at the legendary Paradise, Bawarchi, or a hidden hole-in-the-wall gem.

Adapted for All

Hyderabad Biryani has evolved to cater to every palate. From traditional mutton and chicken options to innovative vegetarian versions like paneer or jackfruit biryani, there’s something for everyone—including authentic approaches to dietary needs.

The Health Benefits of Hyderabad Biryani

Contrary to popular belief, when crafted with quality ingredients and balanced proportions, Hyderabad Biryani can fit well into a healthy diet. Here’s how:

  • Rich in Nutrients: Long-grain basmati rice is an excellent source of complex carbohydrates, while the lean protein in chicken or lamb contributes essential amino acids.
  • Spices with Benefits: Ingredients like turmeric, cloves, and cardamom are packed with antioxidants and medicinal properties.
  • Customizable: You can choose healthier cooking oils and limit the use of ghee for a lighter version without reducing flavor.

Pro Tip for Health-Conscious Foodies: Try a homemade Hyderabadi biryani recipe with brown basmati rice and lean meats or vegetables to combine indulgence with a healthier twist.

How to Make Authentic Hyderabad Biryani at Home

If you’ve tasted Hyderabad Biryani and wished you could recreate its magic at home, we’re here to help! Making this authentic dish may seem daunting, but following these steps can get you close to the original.

Step 1: Gather the Ingredients

For an authentic Hyderabadi biryani recipe, the following are must-haves:

  • Long-grain basmati rice
  • Meat such as chicken, mutton, or goat
  • Fresh yogurt
  • Spices (cardamom, cloves, cinnamon, bay leaves, star anise, etc.)
  • Aromatics like onions, garlic, and ginger
  • Saffron soaked in warm milk
  • Fresh herbs like mint and cilantro
hyderabad biryani

Step 2: Choose Between Kacchi and Pakki Styles

Decide whether you want to prepare Kacchi Biryani or Pakki Biryani. Kacchi Biryani cooks raw marinated meat with parboiled rice, while Pakki Biryani layers cooked meat with cooked rice.

Step 3: Use the Dum Cooking Technique

Seal a heavy-bottomed pot with dough or a tight lid while cooking on low heat. This locks in the steam, allowing the rice and meat to absorb the blend of spices for an unforgettable aroma and taste.

Step 4: Elevate With Garnishes

Always finish with fried onions, roasted nuts, and saffron-infused milk for that signature Hyderabadi touch.

Want to make your own at home? Here’s an easy yet traditional authentic Hyderabadi biryani recipe to try.

hyderabad biryani

Where to Savor the Best Hyderabad Biryani

Hyderabad has an abundance of places where you can sample authentic biryani. Here’s where locals (and global travelers) flock:

  • Paradise: Famous for both its delicious biryani and its long queues.
  • Shadab: A smaller, no-frills spot that many say surpasses more popular destinations.
  • Bawarchi: Renowned for its flavorful mutton and chicken biryani.
  • Cafe Bahar: A classic choice for biryani lovers visiting the city.

Can’t make it to Hyderabad? Don’t worry. Numerous restaurants across the world are recreating the magic of Hyderabadi biryani.

How Hyderabad Biryani Brings Communities Together

Hyderabad Biryani has broken cultural, geographical, and age barriers to become a global sensation. Food enthusiasts worldwide have embraced it, adapted it, and celebrated its glorious flavors, making it much more than just another meal. From bustling Indian kitchens to international food festivals, its appeal transcends borders and continues to grow.

Savor the Flavor

Hyderabad Biryani is truly a dish that tells a story of rich history, culinary mastery, cultural pride, and communal joy. Whether you’re indulging in a restaurant’s perfectly made version or experimenting with an authentic Hyderabadi biryani recipe in your own kitchen, every bite offers a glimpse into a world of taste and tradition.

Recreate this masterpiece at home, explore it in its native city, or join discussions with fellow food lovers. No matter how you experience Hyderabad Biryani, one thing is sure: this food leaves an indelible impression.

Feeling inspired to try it yourself? Discover more authentic recipes and begin your culinary adventure.

Mustard Fish Curry For Non-Veg Lover

Mustard fish curry

When it comes to non-vegetarian food, few dishes capture the soul of regional Indian cooking quite like a spicy, tangy, and aromatic Mustard Fish Curry. This dish is a crown jewel in the world of non-veg curries, especially in Eastern Indian states like West Bengal, Odisha, and parts of Assam. Packed with the punch of mustard seeds and the subtle sweetness of fresh fish, this curry is not just a meal—it’s an experience.

Whether you’re creating a balanced non-veg platter for a weekend feast or looking for a comforting yet bold dish to enjoy with hot steamed rice, mustard fish curry checks every box.

What Is Mustard Fish Curry?

Mustard Fish Curry, also known locally as Shorshe Maach, is a traditional Indian curry in which fresh fish is simmered in a mustard seed paste along with mustard oil and green chillies. The mustard gives the dish a sharp, pungent flavour that’s unmistakably unique—a stand-out among other non-veg curries.

Unlike the heavy, creamy curries found in North Indian cuisine, mustard fish curry is light yet bold, simple yet incredibly flavorful. It’s healthy and protein-rich and beautifully represents the diversity of Indian non-vegetarian food.

Ingredients You’ll Need

One of the best things about this curry is that it doesn’t require fancy or hard-to-find ingredients. Here’s a simple list of what you need:

Fish Curry
  • Fresh fish (Rohu, Katla, Hilsa, or any firm white fish)
  • Yellow mustard seeds
  • Black mustard seeds (optional for extra depth)
  • Green chillies
  • Turmeric powder
  • Salt
  • Mustard oil
  • Water

Yes, that’s all! The magic lies in the technique and balance of flavours, not in an overwhelming list of spices.

The Flavour Profile

Mustard fish curry is not for the faint of heart. The mustard paste gives the dish a sharp, slightly bitter flavour that’s beautifully balanced with the heat of green chillies and the earthy richness of mustard oil. It pairs perfectly with hot, steamed rice, making it a staple in countless non-veg platters served across Eastern India.

The aroma of mustard oil alone will have your mouth watering before the fish even hits the pan!

Step-by-Step Recipe

Here’s how you can make an authentic mustard fish curry at home in under 40 minutes:

Step 1: Prepare the Mustard Paste

Soak 2 tablespoons of yellow mustard seeds and 1 tablespoon of black mustard seeds in water for about 15 minutes. Then grind them with 2 green chillies and a pinch of salt to make a smooth paste. Be careful not to over-blend, or the paste can become bitter.

Step 2: Marinate the Fish

Wash and clean your fish pieces thoroughly. Rub them with turmeric and salt and set aside for 15–20 minutes.

Step 3: Fry the Fish

Heat mustard oil in a pan until it reaches the smoking point (this reduces its pungency), then lower the heat and shallow-fry the fish pieces until golden brown. Remove and set aside.

Step 4: Make the Curry

In the same pan, add the mustard paste and a bit of turmeric. Sauté for a few minutes until the raw smell is gone. Add water to make a gravy (adjust thickness based on preference). Once the gravy starts to boil, gently add the fried fish pieces.

Let it simmer for 5–7 minutes so the fish absorbs all the flavours. Finish with a few slits of green chilies and a drizzle of raw mustard oil on top.

Step 5: Serve Hot

Serve hot with plain steamed rice for a classic and comforting non-vegetarian food experience.

Why This Curry Deserves a Spot on Your Non-Veg Platter

Mustard fish curry brings something unique to your non-veg platter. While chicken and mutton dominate most non-veg curries, fish offers a lighter, healthier protein with an entirely different taste profile. If you’re someone who enjoys diverse and flavorful dishes, this one deserves a regular spot in your weekly menu.

You can even pair it with simple vegetable sides, pickles, and lentils to create a balanced and satisfying meal that reflects traditional Indian culinary wisdom.

Nutritional Benefits

Not only is this dish delicious, but it also comes with a range of health benefits:

  • Fish is a great source of lean protein, omega-3 fatty acids, and essential nutrients.
  • Mustard seeds have antibacterial properties and aid in digestion.
  • Mustard oil, in moderation, is rich in monounsaturated fats and has been traditionally used for joint health and heart health in Indian households.

For those who are health-conscious but still love their non-vegetarian food, this is a guilt-free indulgence.

Regional Variations to Try

Like most Indian recipes, mustard fish curry has several regional variations:

  • Bengali Style: Often includes nigella seeds (kalonji) and is served with rice and green chillies.
  • Odisha Style: Sometimes includes garlic and uses river fish like Rohu.
  • Assamese Style: Often incorporates more mustard oil and occasionally tomatoes for a tangy twist.

Feel free to play around with ingredients and techniques based on what’s available in your kitchen. That’s the beauty of Indian cooking!

Final Thoughts

Mustard fish curry isn’t just another item in the vast world of non-veg curries—it’s a statement dish. It’s bold, traditional, and deeply satisfying. Whether you’re new to Indian non-vegetarian food or a seasoned foodie looking to try something different, this curry offers a memorable culinary journey that hits all the right notes.

So the next time you’re planning a special Sunday lunch or want to wow your guests with something beyond the usual chicken curry, try this mustard fish curry. Add it to your non-veg platter, serve it with love, and watch everyone ask for seconds!


Have you tried mustard fish curry before? Share your favourite version or tips in the comments below. If you loved this recipe, don’t forget to explore more regional non-vegetarian food ideas on our blog!


Crispy & Sweet Shakarpara Recipe

Shakarpara Recipe

Introduction

If you’ve never had Shakarpara before, you’re in for a crunchy, sugary treat that will instantly steal your heart. It’s that snack you pop into your mouth, thinking you’ll stop at one, and then suddenly, half the bowl is gone. Sound familiar?

This recipe will walk you through every step to make the crispiest, sweetest, and most addictive Shakarpara ever. Whether you’re prepping for Diwali, a tea-time snack, or just craving something sweet, this one’s a keeper.


The Origins of Shakarpara

Shakarpara has been around for centuries and is a beloved part of Indian cuisine, especially in states like Maharashtra, Gujarat, and Punjab.

A Traditional Indian Sweet with Deep Roots

It’s believed that Shakarpara has its roots in ancient temple offerings. Its simple ingredients made it accessible to everyone—from kings to commoners.

Regional Variations Across India

In Maharashtra, it’s called Shankarpali, while in Gujarat it’s Shakkarpara. North India even has a savory version, spiced with carom seeds and salt. But our focus here is the sweet, melt-in-your-mouth kind.


Ingredients for Perfect Shakarpara

Let’s talk pantry. You probably have everything you need already!

Basic Pantry Staples

  • 2 cups all-purpose flour
  • 1/2 cup fine semolina (optional but adds crispiness)
  • 1/2 cup sugar
  • 1/4 cup ghee or unsalted butter
  • A pinch of salt
  • Water (as needed)
  • Oil for deep frying

Optional Add-Ins for Extra Flavour

  • Cardamom powder
  • Nutmeg
  • Rosewater (for syrup)

Tools You’ll Need

You don’t need a fancy kitchen setup to make Shakarpara.

Kitchen Essentials

  • A deep frying pan or wok
  • Rolling pin and board
  • Mixing bowl
  • Slotted spoon

Handy Extras for Easier Prep

  • Candy thermometer (for syrup)
  • Pastry cutter (for uniform shapes)

Preparing the Dough

This step is key to getting the right crunch.

Getting the Texture Right

Mix flour, semolina, salt, and sugar. Rub in the ghee until the flour feels like breadcrumbs. Add water gradually and knead into a firm dough.

Tips to Avoid Common Mistakes

Too soft? It’ll absorb oil and turn soggy. Too hard? The Shakarpara will be tough. Aim for a tight but pliable dough.


Rolling and Cutting

This is where things get fun.

Shapes That Work Best

Traditionally, they’re cut into diamond or square shapes, about 1/2 inch in size.

Making It Look Pretty (But Not Too Fancy!)

Use a fluted pastry wheel if you want those cute wavy edges—but trust me, even rough cuts taste just as good.


Frying to Golden Perfection

Frying is an art—don’t rush it.

Oil Temperature Secrets

Heat the oil on medium. Drop a small piece in; it should rise slowly, not sizzle and brown instantly.

How to Get That Crunchy Exterior

Fry in small batches. Stir gently. Let them turn golden—not brown—before taking them out.


Making the Sugar Syrup

This is where the magic happens.

Getting the Right Consistency

You want a one-string consistency. Dip your fingers in the syrup and press them together—when you pull them apart, a single thread should form.

Coating Without Clumping

Toss the fried pieces into warm syrup and stir quickly so each piece is coated. Spread them on a plate to cool.


Cooling and Storage Tips

Patience, grasshopper!

How to Keep Them Crispy for Days

Let them cool completely before storing. If warm, the steam will make them soggy.

Best Containers for Storage

Use an airtight tin or glass jar. Stay away from plastic if possible.


Serving Suggestions

Snacks don’t have to be boring.

Traditional Pairings

Serve with masala chai or milk. They also make great prasad for pujas.

Modern Twists

Crush and sprinkle on vanilla ice cream. Or mix with nuts and dried fruits for a sweet trail mix.


Healthier Shakarpara Options

Because we all want our cake and to eat it too.

Baked Version

Yes, you can bake them at 350°F (180°C) for 15-20 minutes. They won’t puff as much but will still be delish.

Using Jaggery Instead of Sugar

Melt jaggery with a splash of water for the syrup—richer taste, fewer spikes in blood sugar.


Common Mistakes and How to Fix Them

No more Shakarpara fails.

Dough Too Hard or Soft?

Adjust with a spoonful of water or flour, one at a time. Trust your hands—they know.

Soggy Instead of Crispy?

Check oil temperature and make sure they’ve cooled fully before storing.


Kid-Friendly Shakarpara

Snack time = fun time!

Getting the Little Ones Involved

Kids love rolling and cutting dough. Let them help—you might even get new, weird, but lovable shapes.

Flavour Variants They’ll Love

Try cinnamon sugar or even a chocolate drizzle on cooled Shakarpara. Total hit.


Scaling the Recipe for Festivals

Got a crowd coming over? No problem.

Planning Quantities

This recipe makes enough for 4-5 snackers. Double or triple it for parties or gifting.

Storage for Bulk Batches

Layer with parchment paper in tins. Don’t refrigerate—they’ll lose the crunch.


Conclusion

And there you have it—the only Shakarpara recipe you’ll ever need. It’s crunchy, sweet, addictive, and crazy simple to make. Whether you’re reliving childhood memories or creating new ones, this treat has a way of bringing people together—one sugary bite at a time.


FAQs

1. How long does Shakarpara last?
Up to 2 weeks in an airtight container at room temperature.

2. Can I make it gluten-free?
Yes! Use a gluten-free flour mix, but the texture may vary slightly.

3. Is there a way to reduce the sweetness?
Cut down the sugar in the syrup or opt for a thinner coating.

4. Can I freeze Shakarpara?
You can freeze the dough, not the final product—it loses crispiness when thawed.

5. What’s the difference between sweet and savory Shakarpara?
Savory ones skip the syrup and include spices like ajwain and chili powder.

Sabudana Khichdi Delicious & Nutritious

Sabudana Khichdi

Introduction

Sabudana Khichdi is a popular Indian dish made from tapioca pearls (sabudana), peanuts, and mild spices. It is especially consumed during fasting seasons like Navratri, Mahashivratri, and Ekadashi. Light, gluten-free, and full of flavor, this dish is a favorite among health-conscious individuals and those looking for a quick and easy meal.

What is Sabudana?

Sabudana, also known as sago or tapioca pearls, is extracted from the roots of the cassava plant. It is rich in carbohydrates, making it an excellent energy booster. Commonly used in Indian cuisine, sabudana is a staple ingredient for fasting and detox diets.

  • Perfect for fasting – Sabudana khichdi is light on the stomach and adheres to Hindu fasting rules.
  • Quick to prepare – Requires minimal ingredients and can be made in under 30 minutes.
  • Versatile and delicious – Can be customized with spices, vegetables, and nuts.

Ingredients Required for Sabudana Khichdi

Main Ingredients:

  • 1 cup sabudana (tapioca pearls)
  • ½ cup peanuts (roasted and crushed)
  • 1 medium-sized potato (diced)
  • 1 green chili (chopped)
  • 1 teaspoon cumin seeds
  • 1 tablespoon ghee or oil
  • Salt (rock salt for fasting)
  • ½ teaspoon sugar
  • 1 tablespoon lemon juice
  • Fresh coriander leaves (chopped)

Optional Ingredients:

  • Grated coconut
  • Curry leaves
  • Black pepper

Step-by-Step Recipe

Step 1: Soaking Sabudana

  • Wash the sabudana thoroughly until the water runs clear.
  • Soak in water (just enough to cover them) for 4-5 hours or overnight.
  • Drain excess water and let it sit for 30 minutes.

Step 2: Cooking the Spices and Peanuts

  • Heat ghee in a pan and add cumin seeds.
  • Add chopped green chilies and diced potatoes; cook until soft.
  • Stir in crushed peanuts for a crunchy texture.

Step 3: Mixing and Cooking the Khichdi

  • Add soaked sabudana, salt, and sugar to the pan.
  • Cook on low heat, stirring occasionally, until the pearls turn translucent.

Step 4: Garnishing and Serving

  • Squeeze lemon juice and sprinkle fresh coriander leaves.
  • Serve hot with yogurt or green chutney.

Common Mistakes and How to Avoid Them

  • Sticky sabudana? Soak them properly and drain excess water.
  • Hard sabudana? Allow them to rest after soaking.
  • Too dry? Add a splash of water while cooking.

Health Benefits

  • Provides quick energy
  • Good for digestion
  • Gluten-free and easy on the stomach

Conclusion

Sabudana Khichdi is a delightful dish that blends taste with health benefits. Whether you’re fasting or just looking for a light yet filling meal, this dish is a must-try!

FAQs

  1. How long should I soak sabudana for khichdi?
    • At least 4-5 hours or overnight for the best texture.
  2. Can I make sabudana khichdi without peanuts?
    • Yes, you can skip peanuts or replace them with cashews.
  3. Is sabudana khichdi good for diabetics?
    • No, it has a high glycemic index and may spike blood sugar levels.
  4. Can I eat sabudana khichdi daily?
    • It’s high in carbs, so occasional consumption is recommended.
  5. What should I do if my sabudana turns sticky?
    • Rinse well before soaking and drain excess water before cooking.

Gobhi Paratha: A Step-by-Step Recipe for Beginners

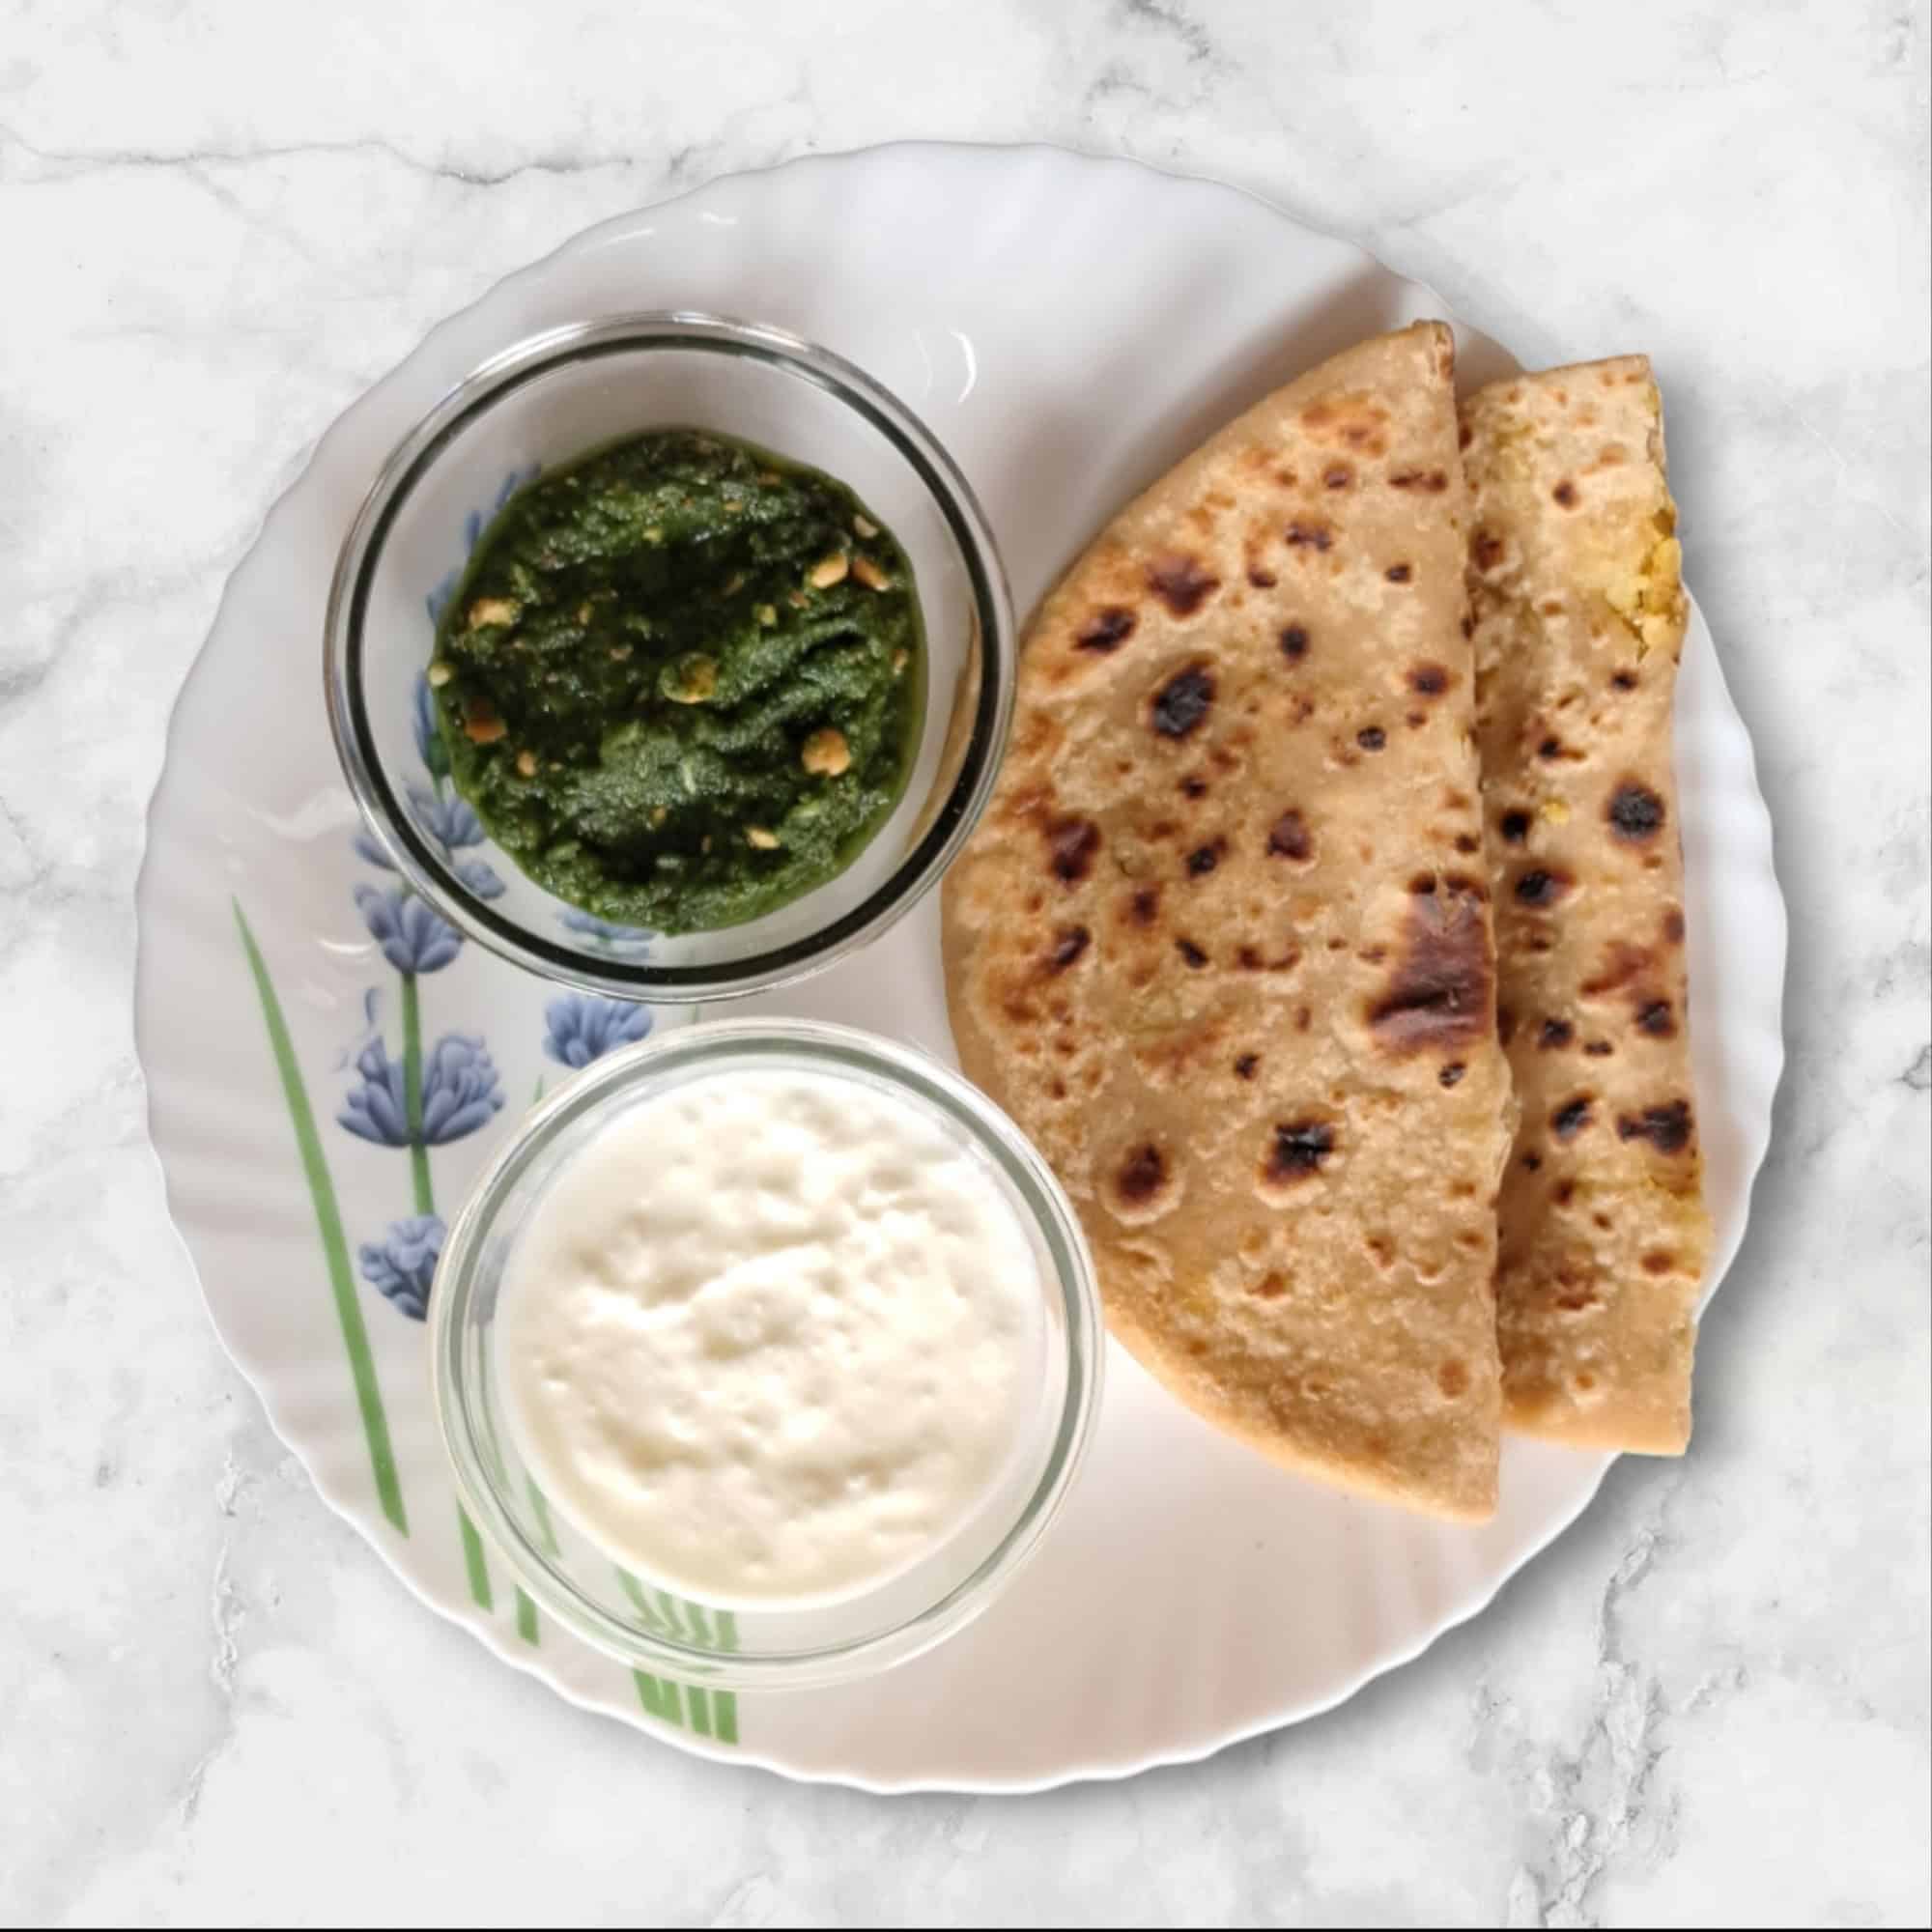
Gobhi Paratha

    Introduction

    Gobhi Paratha is a delicious and nutritious Indian flatbread stuffed with spiced cauliflower. It’s a staple in North Indian households, loved for its crispy texture and flavorful filling. If you’re a beginner looking to make this dish, don’t worry! This guide will walk you through every step, ensuring you can make soft, flavorful parathas with ease.

    Ingredients Required

    For the Dough:

    • 2 cups whole wheat flour
    • ½ teaspoon salt
    • ¾ cup water (adjust as needed)
    • 1 teaspoon oil (optional)

    For the Stuffing:

    • 1 medium cauliflower (grated)
    • 1 teaspoon salt
    • ½ teaspoon red chili powder
    • ½ teaspoon turmeric powder
    • ½ teaspoon garam masala
    • 1 teaspoon coriander powder
    • 1 teaspoon cumin seeds
    • 1 green chili (finely chopped)
    • 2 tablespoons chopped cilantro
    • 1 teaspoon grated ginger

    How to Make the Dough

    1. In a large bowl, mix whole wheat flour and salt.
    2. Gradually add water and knead until a smooth dough forms.
    3. Add a teaspoon of oil and knead for 5 more minutes.
    4. Cover and let the dough rest for 30 minutes.

    Preparing the Gobhi Stuffing

    1. Wash and grate the cauliflower.
    2. Squeeze out excess water using a muslin cloth or hands.
    3. In a bowl, mix the grated cauliflower with all the spices, ginger, green chili, and cilantro.
    4. Ensure the mixture is dry and well-mixed.

    Stuffing and Rolling the Paratha

    1. Divide the dough into equal-sized balls.
    2. Roll one ball into a small disc and place 2 tablespoons of stuffing in the center.
    3. Seal the edges and flatten slightly.
    4. Roll again into a round shape, ensuring the filling doesn’t spill out.

    Cooking the Paratha on a Tawa

    1. Heat a tawa (flat pan) on medium heat.
    2. Place the rolled paratha on the hot tawa and cook for 1 minute.
    3. Flip and apply a little oil or ghee.
    4. Cook both sides until golden brown and crisp.

    Serving Suggestions

    • Serve hot with fresh yogurt, butter, or pickles.
    • Pair with a cup of masala chai for a perfect meal.

    Tips and Tricks for the Perfect Gobhi Paratha

    • Ensure the cauliflower stuffing is dry to prevent the paratha from tearing.
    • Use a hot tawa for even cooking.
    • Adjust spices to taste.
    • Experiment with adding cheese or paneer for extra flavor.

    Conclusion

    Making Gobhi Paratha at home is simple and rewarding. With the right techniques and ingredients, you can prepare delicious, crispy, and flavorful parathas in no time. Follow this guide, and you’ll soon master this classic North Indian dish!

    FAQs

    1. Can I make Gobhi Paratha without wheat flour?

    Yes! You can use multigrain flour, oat flour, or gluten-free alternatives.

    2. How do I store leftover parathas?

    Store them in an airtight container in the fridge for up to 2 days. Reheat on a tawa before serving.

    3. Can I use frozen cauliflower for stuffing?

    Yes, but ensure you thaw and squeeze out excess moisture before using.

    4. What other fillings can I try?

    You can experiment with paneer, radish (mooli), or potato (aloo) fillings.

    5. How do I make the parathas extra crispy?

    Cook on medium-high heat and apply a little extra ghee or butter while flipping.


    How to Bake the Perfect Plum Cake – Tips & Tricks!

    Plum cake

    Introduction:

    Plum cake is a rich, flavorful treat, often enjoyed during festive seasons. Whether you’re making a traditional Christmas plum cake or a moist, fruit-filled delight for any occasion, follow these steps to ensure a perfect bake every time!

    Ingredients You’ll Need:

    • 1 cup all-purpose flour
    • ½ cup unsalted butter (softened)
    • ½ cup sugar (brown or white)
    • 2 eggs
    • ½ cup yogurt or buttermilk
    • 1 teaspoon vanilla extract
    • 1 teaspoon baking powder
    • ½ teaspoon baking soda
    • 1 teaspoon cinnamon powder
    • ¼ teaspoon nutmeg powder
    • ½ cup chopped dried plums (or prunes)
    • ½ cup mixed dried fruits (raisins, cranberries, figs, etc.)
    • ¼ cup chopped nuts (walnuts, almonds, cashews)
    • 2 tablespoons orange juice or rum (for soaking dried fruits)
    • A pinch of salt

    Step-by-Step Instructions:

    1. Soak the Fruits

    • Soak dried plums and mixed fruits in orange juice or rum for at least 4 hours (or overnight for best results). This enhances flavor and keeps the cake moist.

    2. Prepare the Cake Batter

    • Preheat your oven to 170°C (340°F). Grease and line a baking pan.
    • In a bowl, cream butter and sugar until light and fluffy.
    • Add eggs one at a time, beating well after each addition.
    • Mix in vanilla extract and yogurt/buttermilk.

    3. Combine Dry Ingredients

    • In a separate bowl, sift flour, baking powder, baking soda, cinnamon, nutmeg, and salt.
    • Gradually fold the dry ingredients into the wet mixture, mixing gently to avoid overmixing.

    4. Add Fruits & Nuts

    • Toss the soaked fruits and nuts in a little flour (to prevent them from sinking).
    • Gently fold them into the batter.

    5. Bake the Cake

    • Pour the batter into the prepared cake tin. Smooth the top with a spatula.
    • Bake for 40-50 minutes or until a toothpick inserted in the center comes out clean.

    6. Cool & Serve

    • Let the cake cool in the pan for 10 minutes before transferring it to a wire rack.
    • Slice and enjoy with tea, coffee, or as a festive dessert!

    Tips & Tricks for a Perfect Plum Cake

    Use Good-Quality Fruits: Fresh, plump dried fruits add natural sweetness and moisture to the cake.

    Soak the Fruits Well: Soaking prevents dryness and adds depth to the flavor.

    Don’t Overmix: Overmixing can make the cake dense. Gently fold the ingredients for a light texture.

    Check for Doneness: Every oven is different, so always test with a toothpick before removing the cake from the oven.

    Store Properly: Wrap the cake in cling film or an airtight container to keep it moist for days.

    Now, you’re ready to bake the perfect plum cake! Enjoy baking and happy eating! 😊🍰

    Frequently Asked Questions (FAQs)

    1. Can I make plum cake without eggs?
      Yes! You can substitute eggs with mashed bananas, applesauce, or flaxseed meal (1 tablespoon flaxseed + 3 tablespoons water per egg). Yogurt or buttermilk also works well for a moist texture.
    2. How long should I soak the dried fruits?
      For the best flavor and moisture, soak the dried fruits overnight. However, if you’re short on time, soaking them for at least 4 hours in orange juice or rum will still enhance the taste.
    3. Why do my dried fruits sink to the bottom of the cake?
      To prevent this, coat the soaked fruits with a little flour before adding them to the batter. This helps distribute them evenly throughout the cake.
    4. How do I store plum cake to keep it fresh?
      Wrap the cake tightly in cling film or store it in an airtight container at room temperature for up to 3 days. For longer storage, refrigerate it for up to a week or freeze it for up to 3 months.
    5. Can I use fresh plums instead of dried plums?
      Yes, but fresh plums contain more moisture, which may slightly alter the cake’s texture. If using fresh plums, reduce the amount of liquid (yogurt/buttermilk) slightly to balance the moisture.

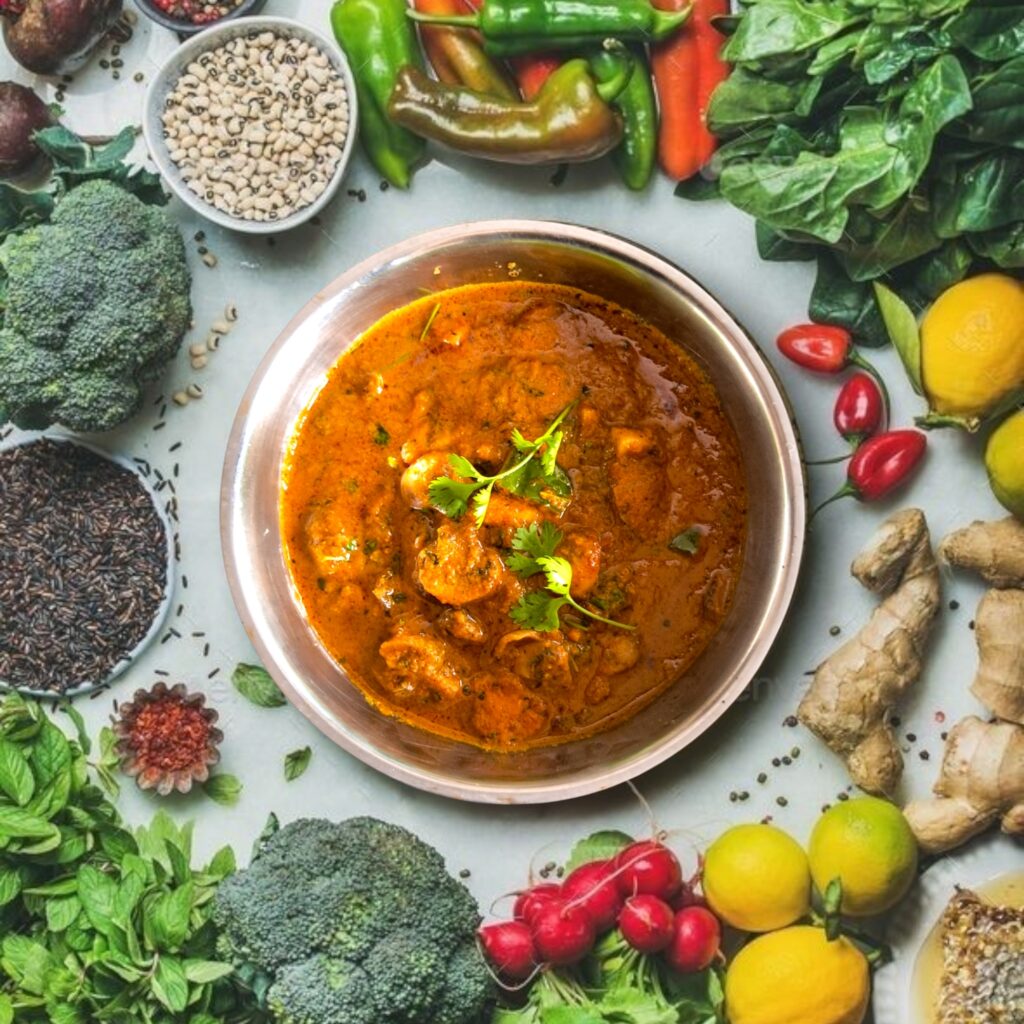
    Kadai Mushroom: The Ultimate Spicy & Flavour Dish

    Kadai Mushroom
    Kadai Mushrooms

    Introduction

    Kadai Mushroom is one of the most popular and flavorful Indian dishes, known for its rich, spicy, and aromatic taste. It is a perfect vegetarian delight that features mushrooms cooked in a special blend of spices, called Kadai mushroom, along with onions, tomatoes, and bell peppers. Whether you’re a fan of spicy food or just looking for a quick yet delicious meal, Kadai Mushroom is a must-try.

    Ingredients Required for Kadai Mushroom

    Main Ingredients:

    • 200g fresh mushrooms (button or cremini)
    • 1 large onion, sliced
    • 2 tomatoes, pureed
    • 1 green bell pepper, sliced
    • 2 tbsp oil or butter
    • 1 tsp cumin seeds
    • 1 tsp ginger-garlic paste

    Spice Blend:

    • 1 tsp red chilli powder
    • ½ tsp turmeric powder
    • 1 tsp coriander powder
    • ½ tsp garam masala
    • 1 tsp Kasuri methi (dried fenugreek leaves)
    • Salt to taste

    Optional Add-ons:

    • Paneer for a richer version
    • Cashew cream for a vegan twist

    The Secret Behind Kadai Mushroom

    Kadai mushroom is what makes this dish unique. You can make it by dry roasting and grinding coriander seeds, dried red chillies, cumin, and black peppercorns. Homemade Kadai mushroom provides a fresher and more robust flavour than store-bought ones.

    Step-by-Step Cooking Instructions

    1. Heat oil in a pan and add cumin seeds.
    2. Sauté onions until golden brown, then add ginger-garlic paste.
    3. Add tomato puree and cook until the oil separates.
    4. Stir in the spice blend and mix well.
    5. Add sliced mushrooms and cook on high heat.
    6. Toss in bell peppers and stir-fry for a couple of minutes.
    7. Sprinkle garam masala and Kasuri methi before serving.

    Best Side Dishes for Kadai Mushroom

    • Indian Breads: Serve with naan, roti, or paratha.
    • Rice Pairings: Goes well with jeera rice or plain basmati rice.
    • Cooling Sides: A cucumber raita balances out the spice.

    Tips for Making Restaurant-Style Kadai Mushroom at Home

    • Use fresh mushrooms for the best texture.
    • Cook on high heat to maintain the crunchiness of bell peppers.
    • Don’t overcook mushrooms, or they will release too much water.

    Common Mistakes to Avoid

    • Overcrowding the pan: Mushrooms should be stir-fried, not steamed.
    • Too much liquid: Kadai Mushroom is a semi-dry dish, so avoid adding excess water.
    • Incorrect spice balance: Always taste and adjust as needed.

    Conclusion

    Kadai Mushrooms are a perfect blend of spice, texture, and aroma. Whether you’re making them for a family dinner or a weekend treat, this dish is sure to impress. With the right balance of spices and proper cooking techniques, you can recreate the magic of restaurant-style Kadai Mushrooms at home!

    FAQs

    1. Can I make Kadai mushrooms without onions and garlic?
    Yes! Simply skip the onions and garlic and enhance the flavour with asafoetida (hing) and more tomatoes.

    2. What is the best type of mushroom to use for this dish?
    Button mushrooms are the most common, but cremini mushrooms work great too.

    3. How long does it take to cook Kadai mushrooms?
    From prep to plate, it takes about 30 minutes.

    4. Can I make this dish in advance?
    Yes, you can store it in the fridge for up to 2 days.

    5. What’s the difference between Kadai Mushroom and Mushroom Masala?
    Kadai Mushroom is semi-dry and cooked with bell peppers, while Mushroom Masala has a creamy gravy.